


Connecting a printout in NAVIGATOR
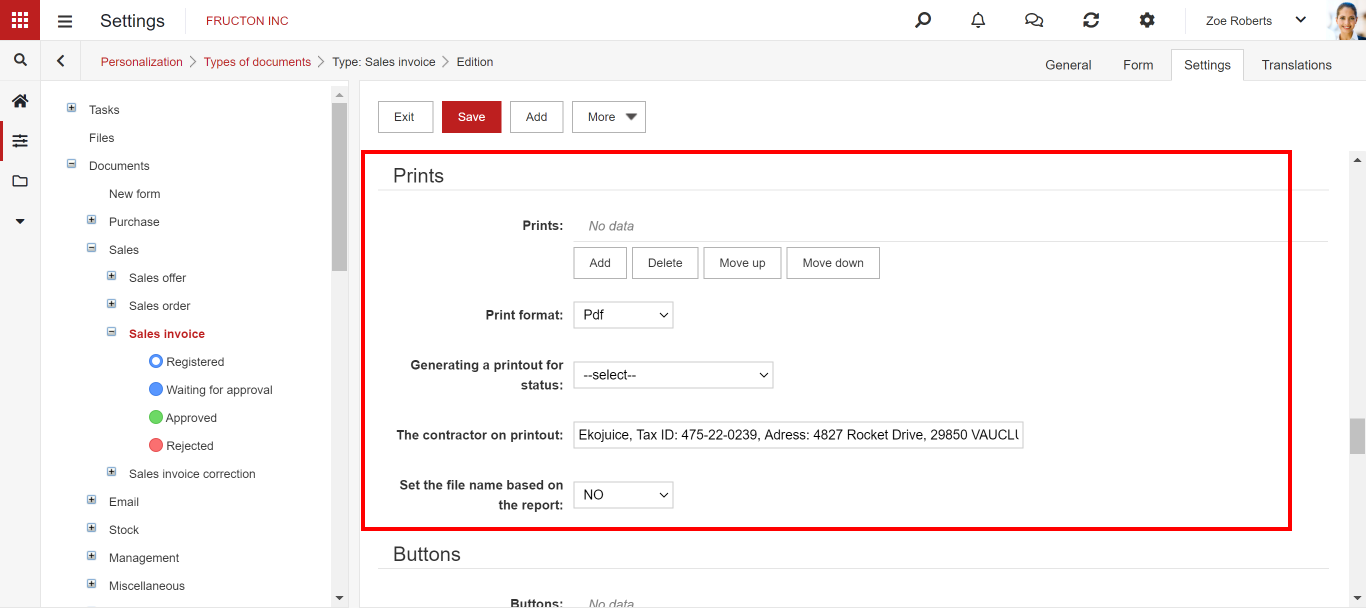
To attach a printout to NAVIGATOR, go to Personalization> Document Types. Select a specific document, edit it and go to the Settings tab. Find the Printouts segment and click Add.
Name: The name will be visible after expanding “More” in the selected document.
Link: This is the path to the directory where our printout is located.
For many: A choice wether to generate this specific printout for one or many documents.
Default: A choice whether you want this printout to be the default for this document.
Print format: Select the print format.
Below we add three more fields: Print format, which is set for all added printouts, Generating printout for status, Contractor on printout.
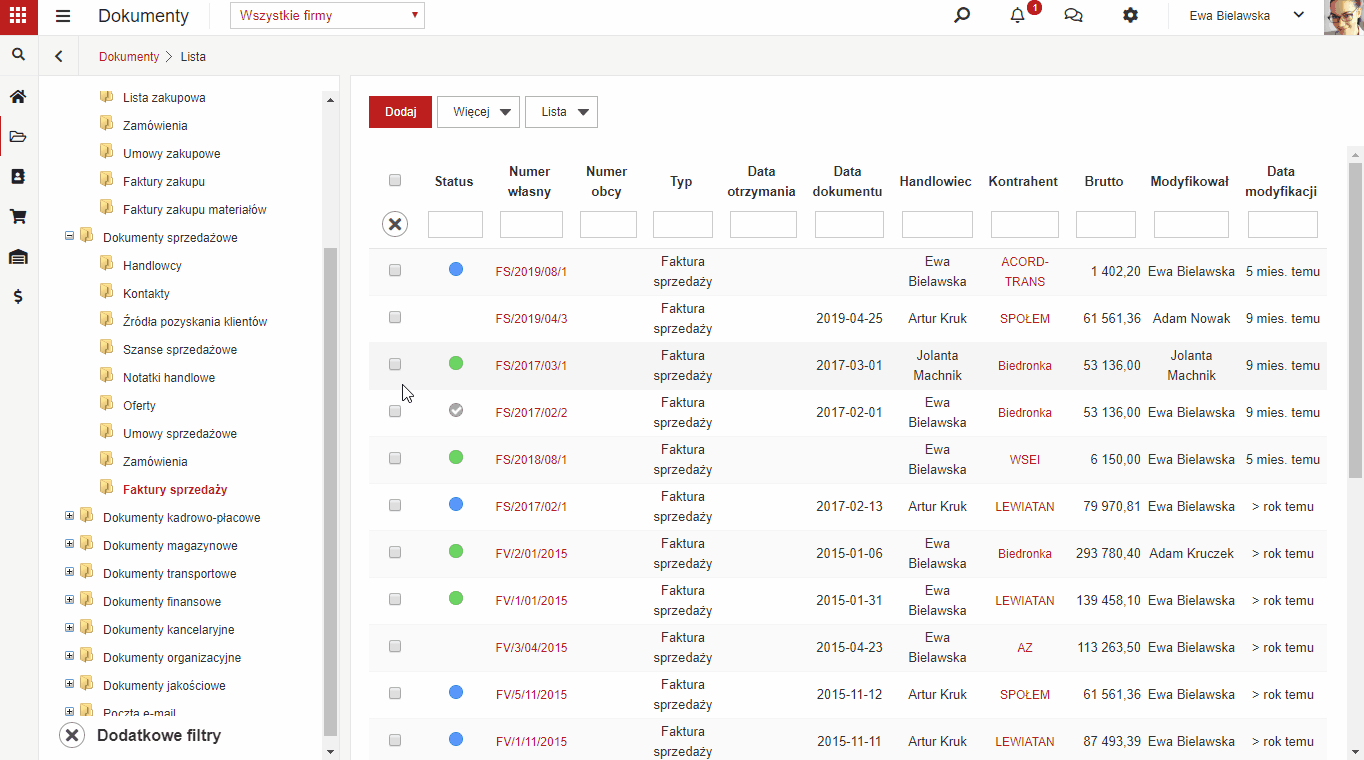
To check if the attached printout works properly, go to the document to which you added the printout. Then select “More”.
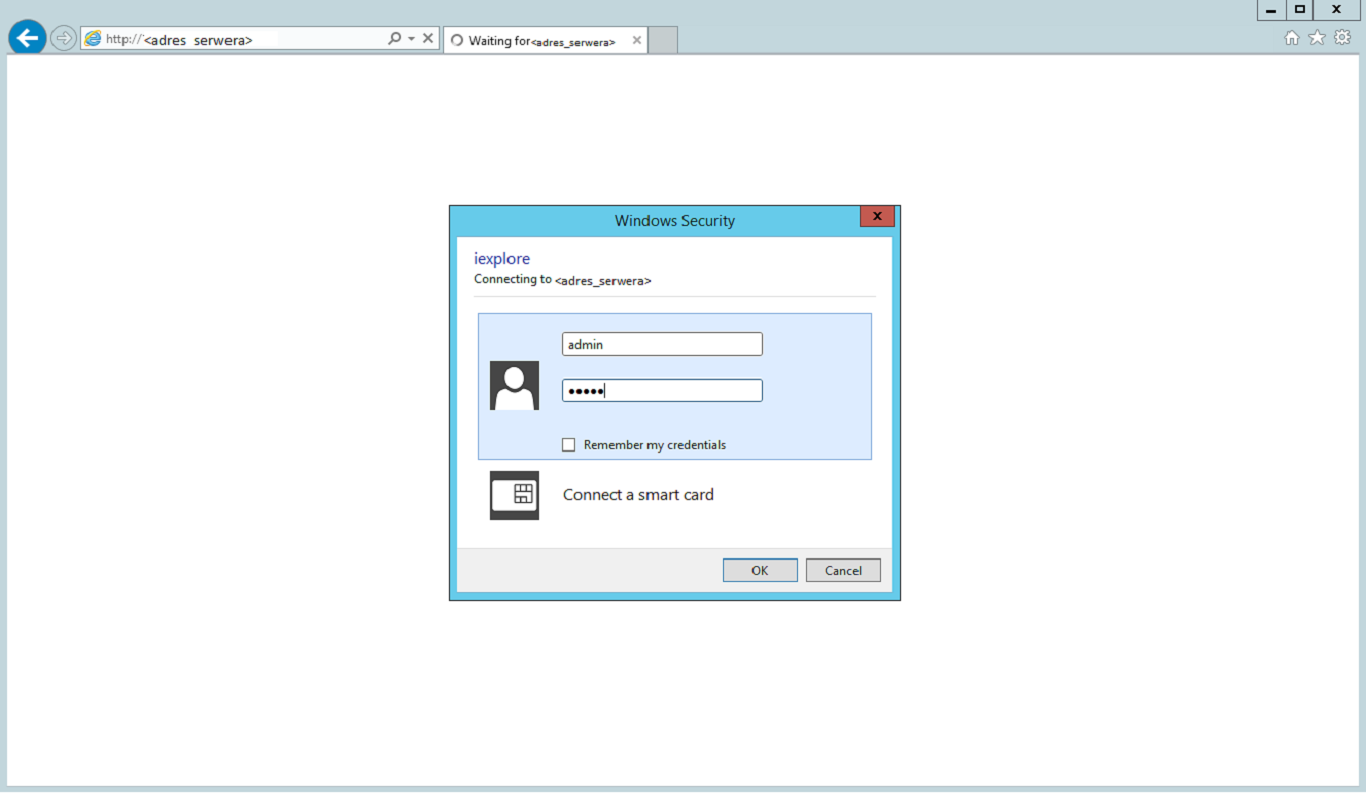
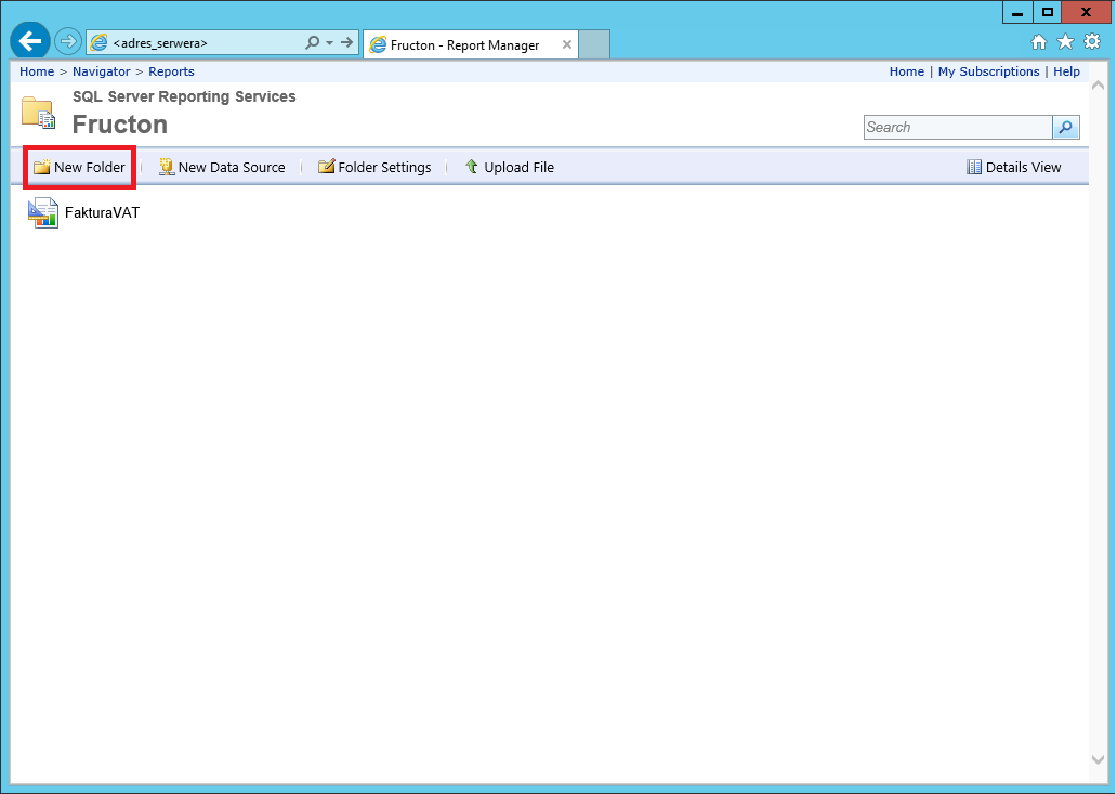
Print server
To access the print server, you need to go to the IP address of the server in your browser. The server will require authorization from us. After successful authorization, the browser will redirect us to directories where our printouts are located.
After logging in, you will se open catalogues. The path to your printout can be found at the URL address.

On the server, you can add and delete directories.
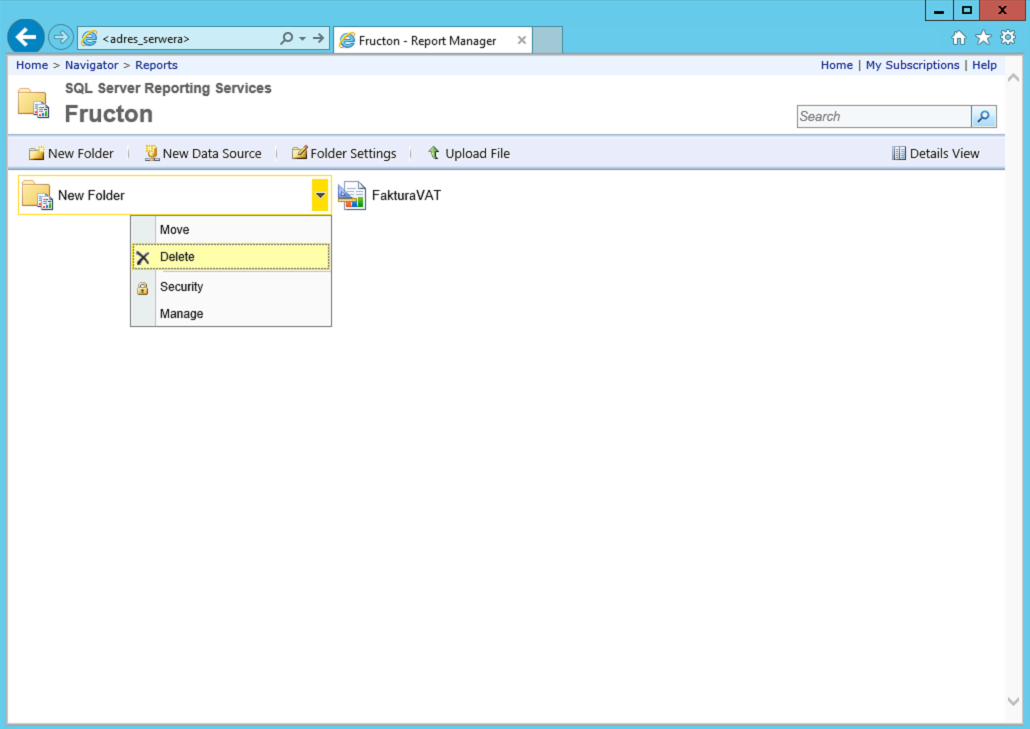
Printouts can be moved between directories using the move option.
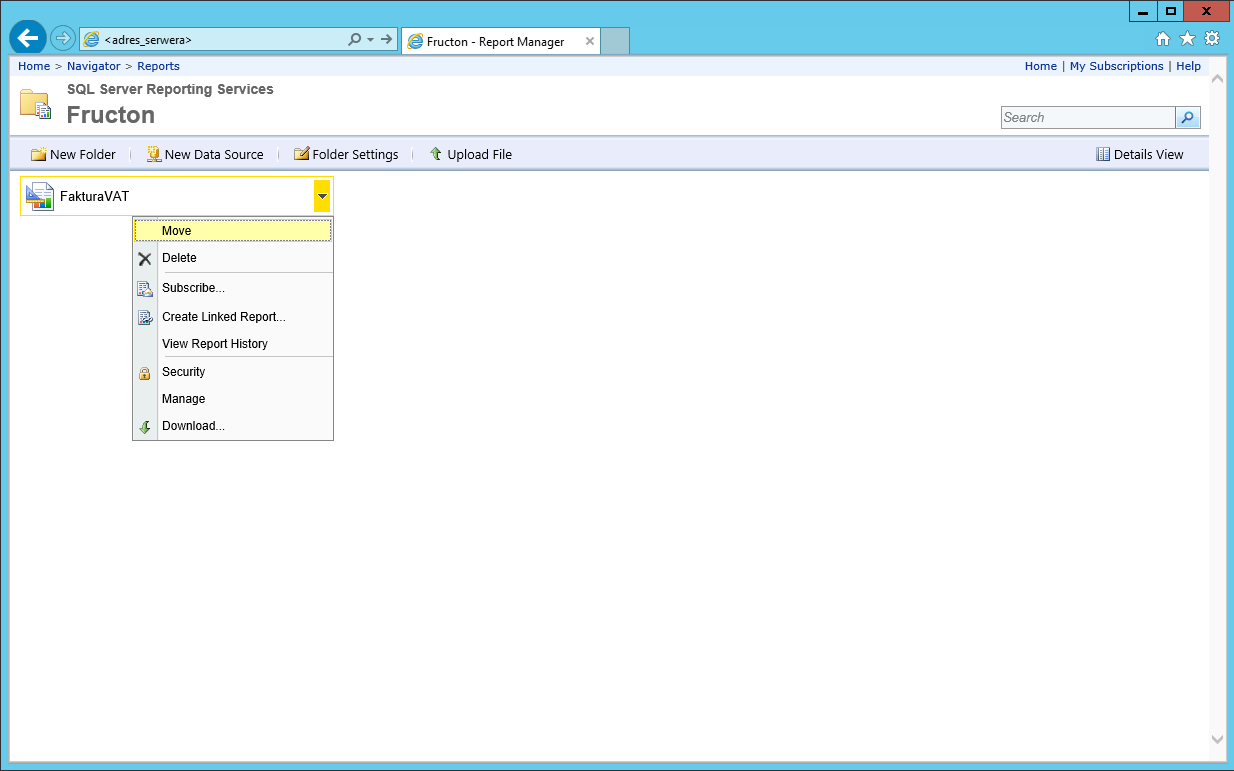
You can download printouts from the server.
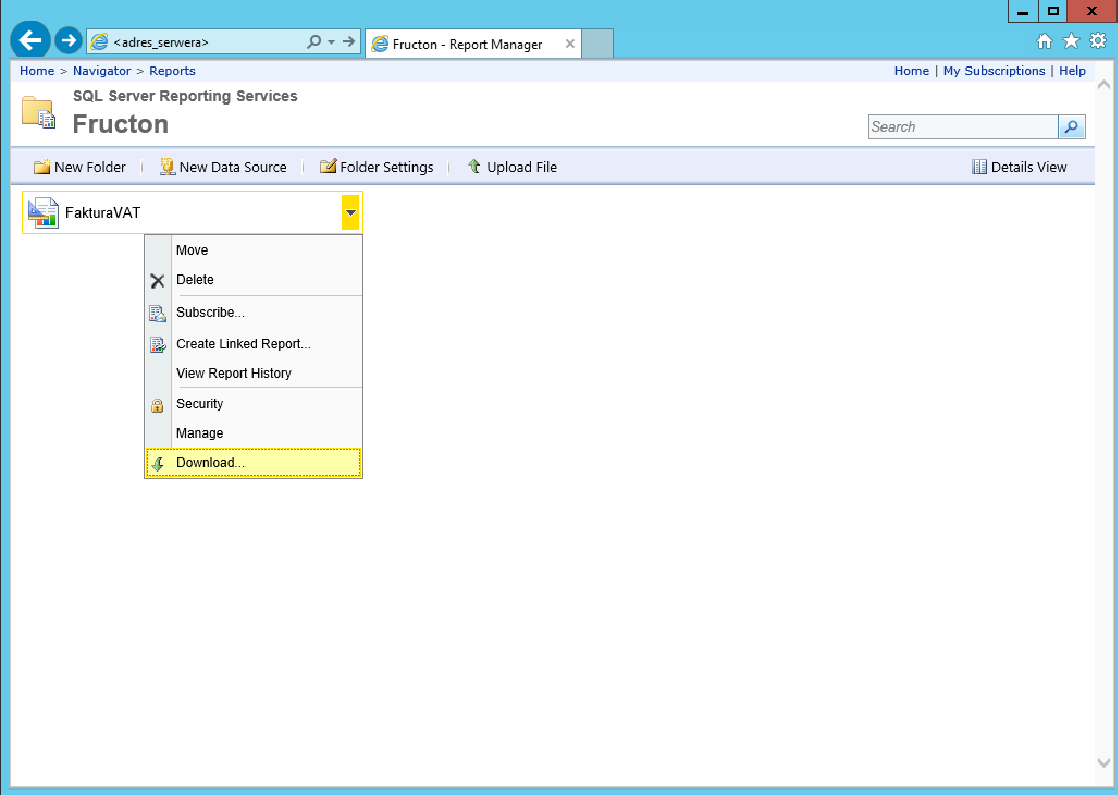
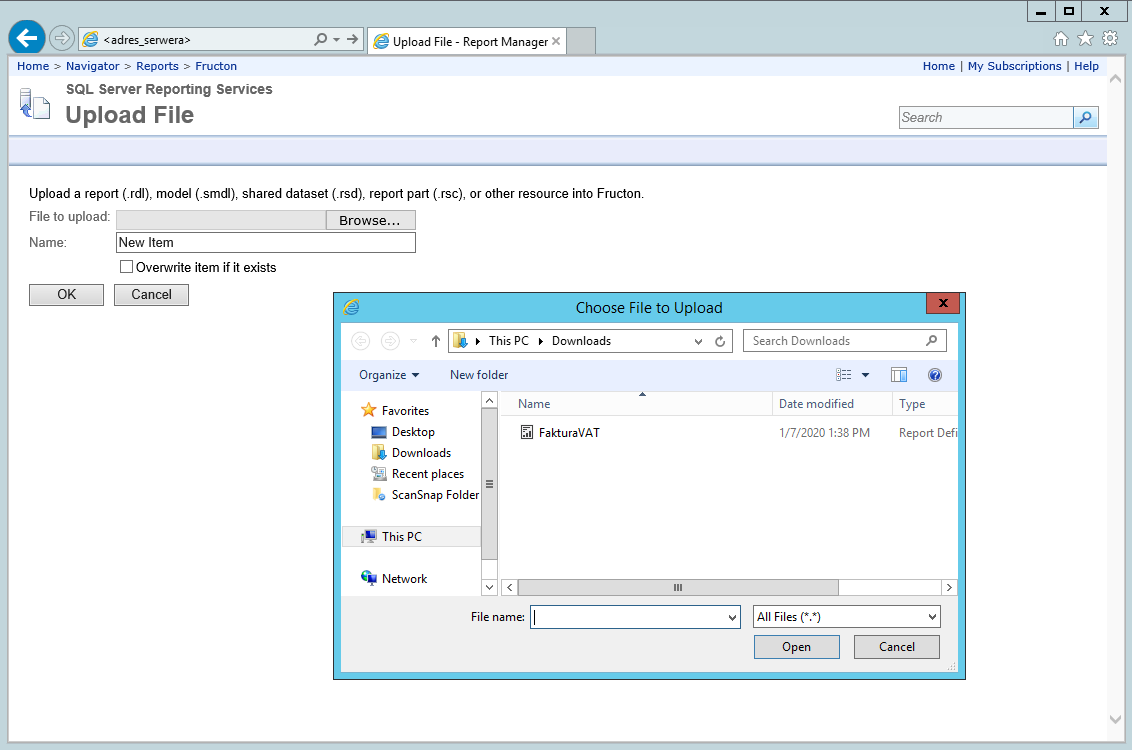
You can also upload them to the server.
Report Builder
Report Builder is used to create and edit printouts. Full documentation of this tool is available on the manufacturer’s website.
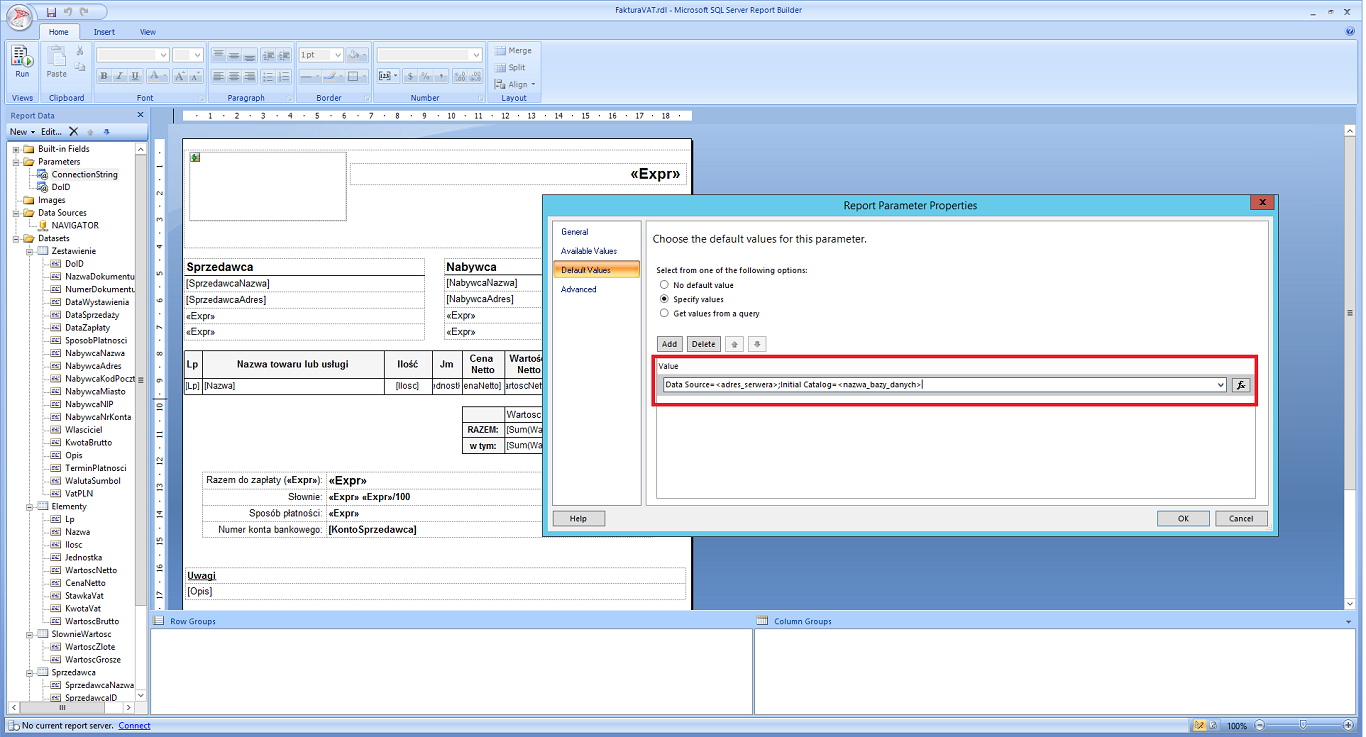
Connection String is an important element of the printout. Connection String is used to connect to the data source. To create it, you need the server address and database name. This data is entered in Report Builder, in the Parameters tab.