


Documents are an essential part of any application in the Navigator system. Documents processed in the system can be accessed both through a dedicated application, e.g. e-mail and through the Documents application
Document categories
What is a document category? The easiest way to imagine it is as an office binder in which documents of one type, such as invoices, are sorted. In the Navigator system, you can build a hierarchical category structure. The layout of the categories makes it easier to search for documents. In addition, user permissions can be assigned to the category, which allows better managing access to documents.
 ‘
‘
A user with appropriate permissions can edit existing categories or add their own.
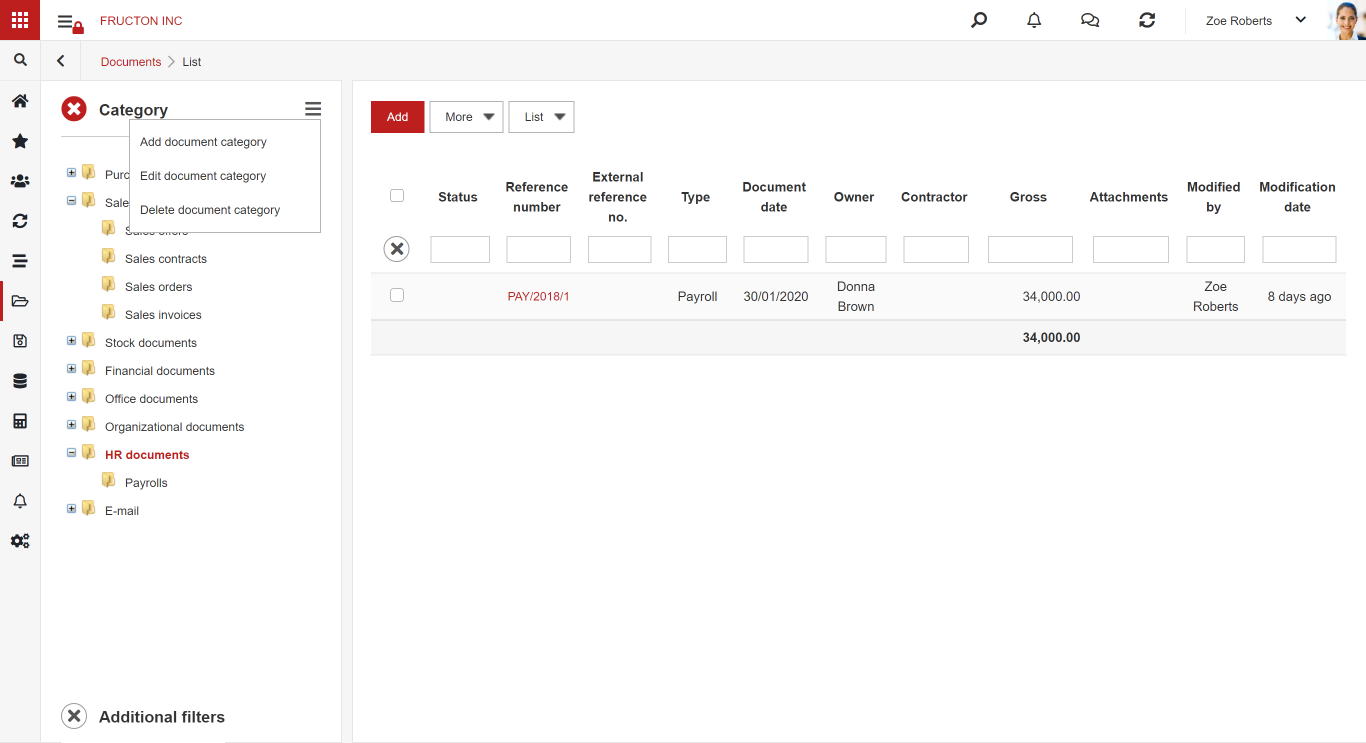
After saving, you can add documents to the newly created category. It is worth mentioning that each document type in the system should have assigned categories. Even if the user does not see the category when adding the document, the category is usually assigned. Very often, when creating dedicated applications, the category is not shown in the application because the application uses one category. However, this category can be found in the Documents app.
Document search
You can find a document in the NAVIGATOR system in different ways. Documents can be found in the Documents application, in a dedicated application, or through one of the browsing and searching mechanisms.
Documents application
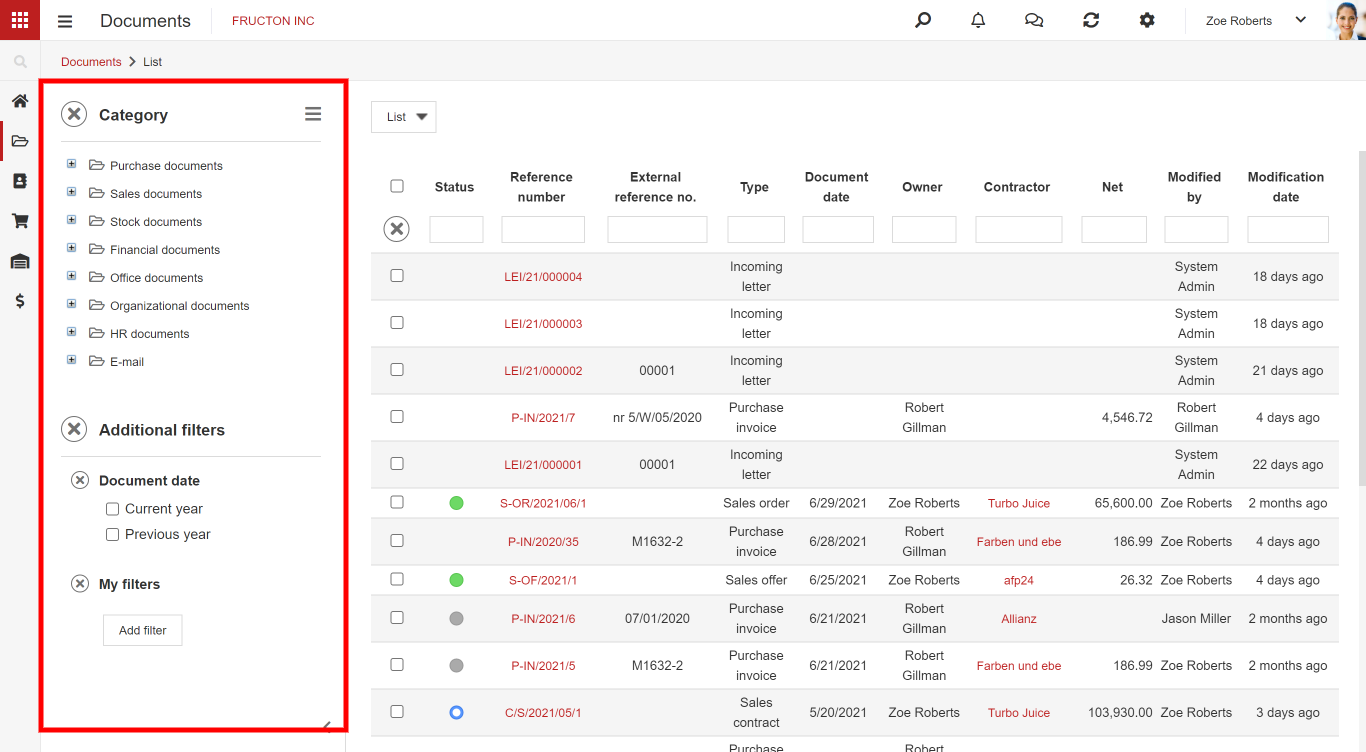
After selecting the Documents application you have access to categories and documents from every application. You can start searching by going through the document list and use the list search function, or you can select the appropriate category and go through the documents in this category.
Dedicated application
As a rule, a dedicated application has a special dashboard that makes finding relevant information easier. Below is an example of a CRM application desktop: you can go to the current documents immediately or select the area presenting individual types of documents from the application menu.
Documents in workflow
Another method of accessing a document is to search through documents in a workflow. These are all documents in which the logged-in user had or is to act. To view workflow activities, go to Document Workflow> Workflow. Here you can search for activities that are pending, approved, transferred, etc. After clicking on a document’s icon, the system will open the indicated document.
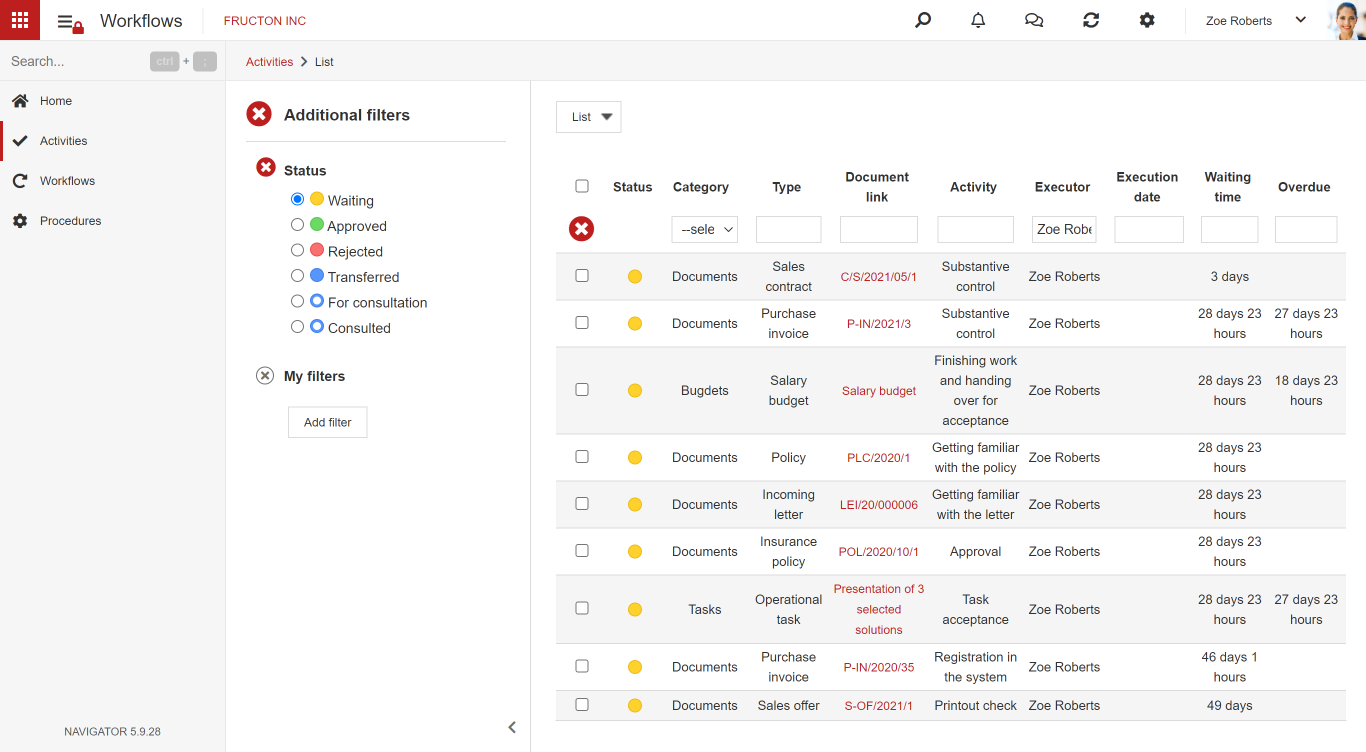
This search method is best used if you know what happened with a given document, for example, if you are looking for a document that is submitted for consultation.
Documents that you are tagged in
Another, quite an unusual method of finding a document is notifications. If another user mentioned you in the comment to the document, information about it will appear in the notifications. By clicking on the notification, you can immediately go to the document. After opening the document, the information about the new notification disappears, but the list of notifications is still available under the bell icon, i.e. documents in which you were mentioned.
Other methods of document searching
If none of the above methods of finding a document work, there are still standard methods of searching for applications described in a separate article.
Pending documents
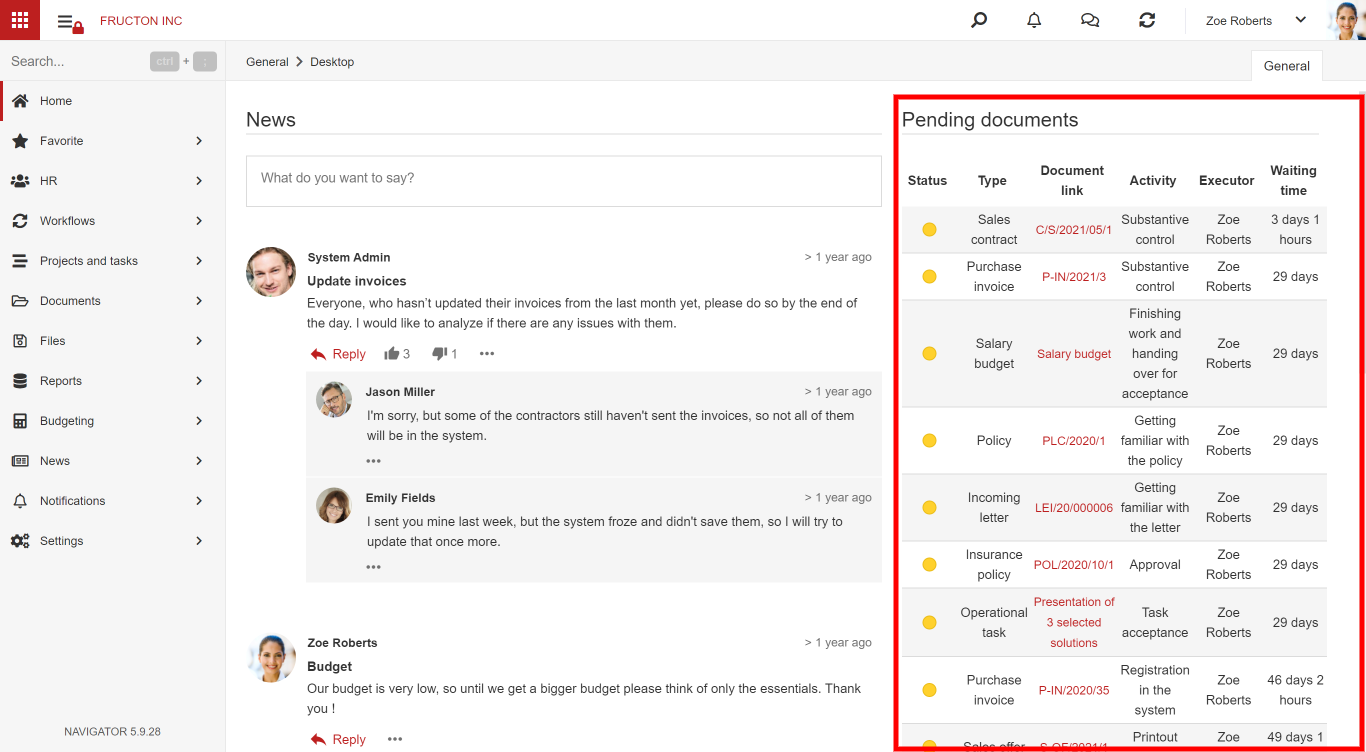
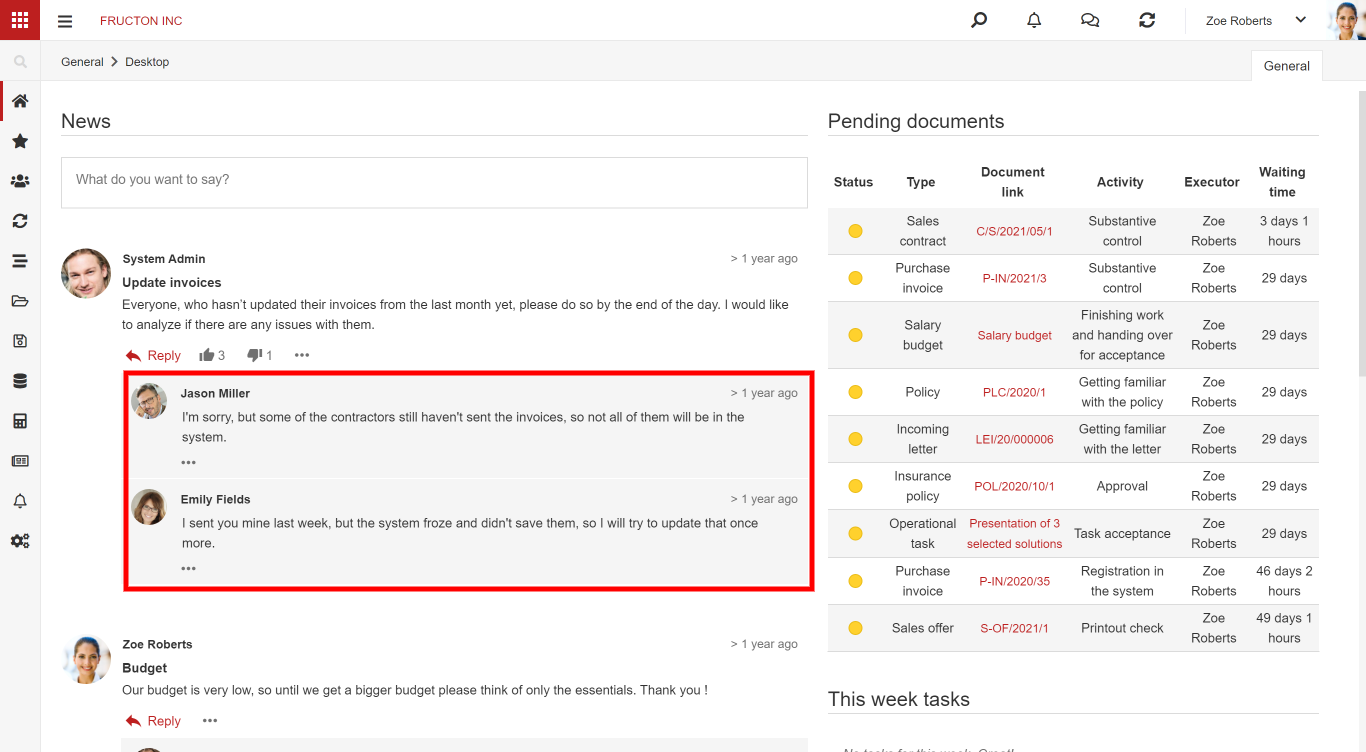
Pending documents are an important category and can serve as another searching tool. These are the documents that await your action. You can get to them through Documents in workflow described in the previous paragraph, however, because it is a very important category of documents, usually the list of pending documents is visibly displayed in the system. In the standard configuration, the list of pending documents is visible on the main desktop of the system. You can see here the type of document, its icon, the type of action that is expected, and the waiting time. From this list, you can get directly to the document by clicking on its icon. In dedicated applications, a similar list of documents waiting within the application is placed on the application desktops.
Document preview
The document can be accessed in two modes: preview and editing. The editing mode works slower, so most often after opening the document, you are in the preview mode. In this mode, you cannot modify any data on the document. However, you have the option to perform the workflow steps as shown in the example below.
Attachment preview
The attachment panel is not a typical tab, but a form element visible from each tab. If you are in the editing mode, you can add an attachment or run the OCR function, i.e. image recognition. You can add any number of attachments to the document.
If you have little space on the screen, you can hide them.
By default, the attachment preview is processed, which makes it possible to enlarge the attachment or move it with the mouse. In this mode, it is also possible to show the links between the document fields and the attachment. In the case of using OCR mechanisms, when document fields are filled with values taken from an attachment, after clicking on such a field in the attachment view, a pin appears.
The second attachment preview mode is native. To switch between modes, click on the magnifying glass icon on the attachment:
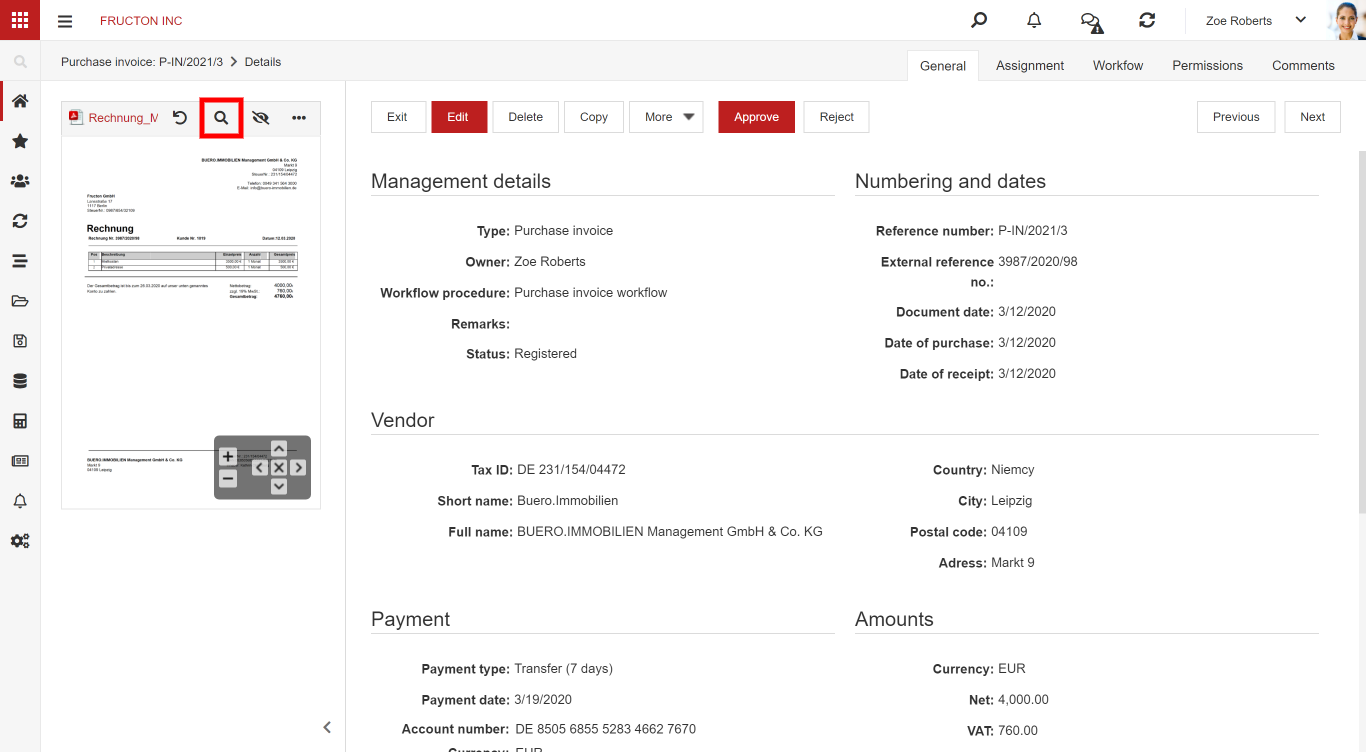
After switching, the attachment displaying control turns into a standard PDF control embedded in the page. You have at your disposal functions such as printout, two-page view, etc.
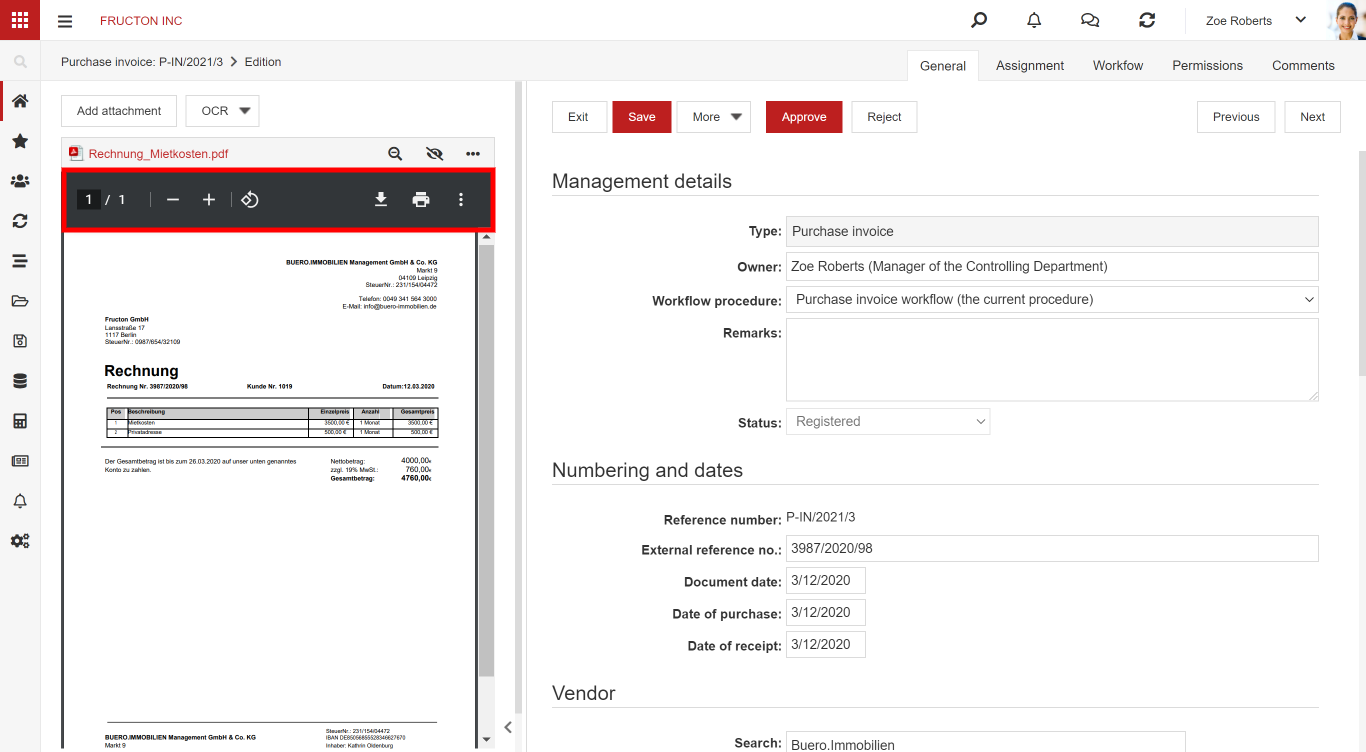
In this mode, you cannot enlarge the attachment with the mouse – you have standard + and – buttons), the places on the form from which the data was loaded into the fields form will also not work.
Note: the administrator can set the ability to switch between modes in the configuration or make only one mode available to the user.
Document acceptance
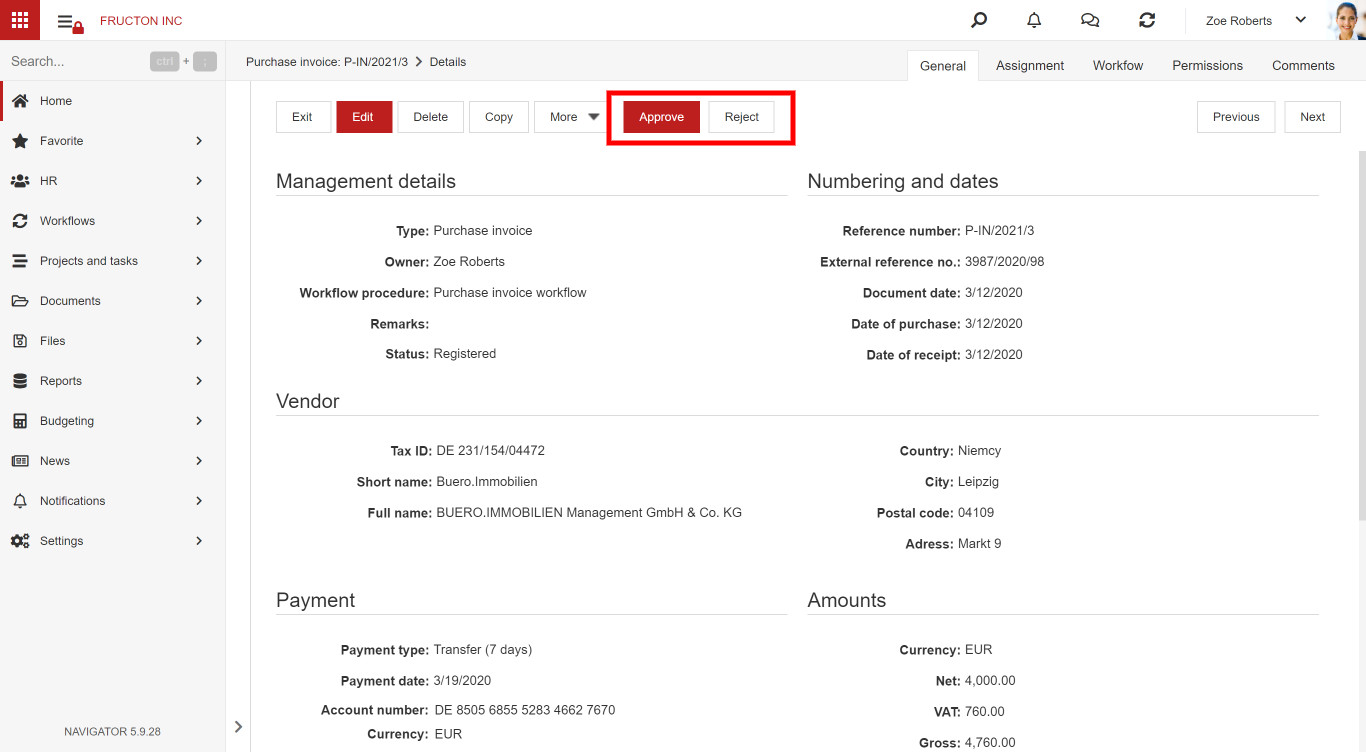
As part of the document workflow, users assigned to a workflow have actions to perform. By default, actions can be approved or rejected or only approved. If the document is waiting for the user’s action, additional buttons appear on the form:
The system administrator can give other names for the action to be performed but by default, the highlighted button is acceptance/approval, and the unchecked button means no acceptance/rejection. Another place from which you can accept the document is Workflow in the Document workflow application.
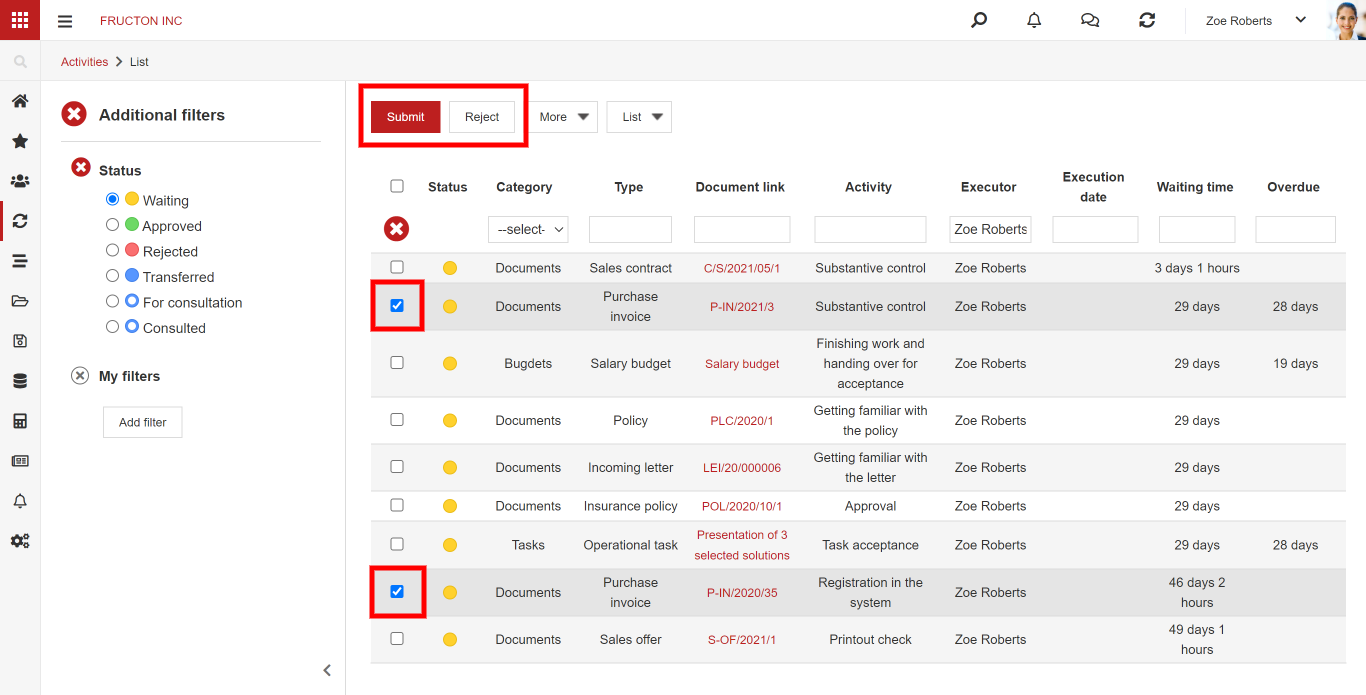
As you can see in the example above, at this point you can accept more documents. This allows for mass acceptance without having to enter each document separately.
Consultations
Sometimes you are not able to decide on a document on your own. You might need to consult the decision with other coworkers. There are tools in the Navigator system that can help you to do this. All you need to do is select the Consult option, select the person and write what you need from them.
These are ad hoc activities that go beyond the defined workflow. It allows to pass the workflow action to users, which were not indicated in the defined workflow procedure.
If the person to whom you send a request for consultation responds, the workflow returns to you and waits for the action to be performed in the step in which you stopped for the matter for consultation.
Forward the operation
Forwarding the operation works similarly to consultation, here we can also indicate a person from outside the workflow to whom the action will be transferred. The difference is that while during consultations the workflow returns to the person responsible for the workflow step, in the case of forward, the person to whom we transfer it must complete the current step in the workflow.
Comments
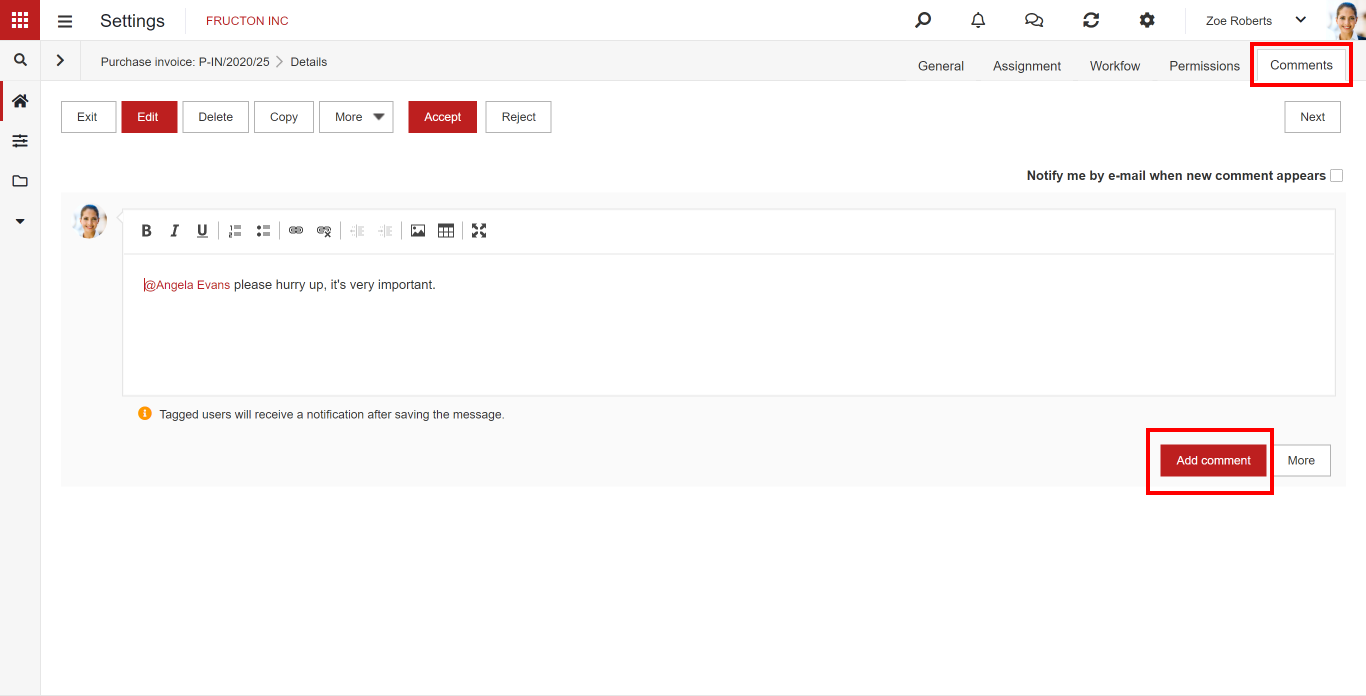
In the Navigator system, you can add comments not only to messages but also to documents, budgets, projects, and many others. As a rule, comments are located in a separate tab on the document, sometimes, as in the case of a message, just below the message.
Comments work much like messages. You can use them to tag colleagues or like comments. As in the case of messages, the user who has been mentioned in the comment will get information about the new message.
Note: It may happen that the mentioned person does not have permission to the document you have tagged them in.
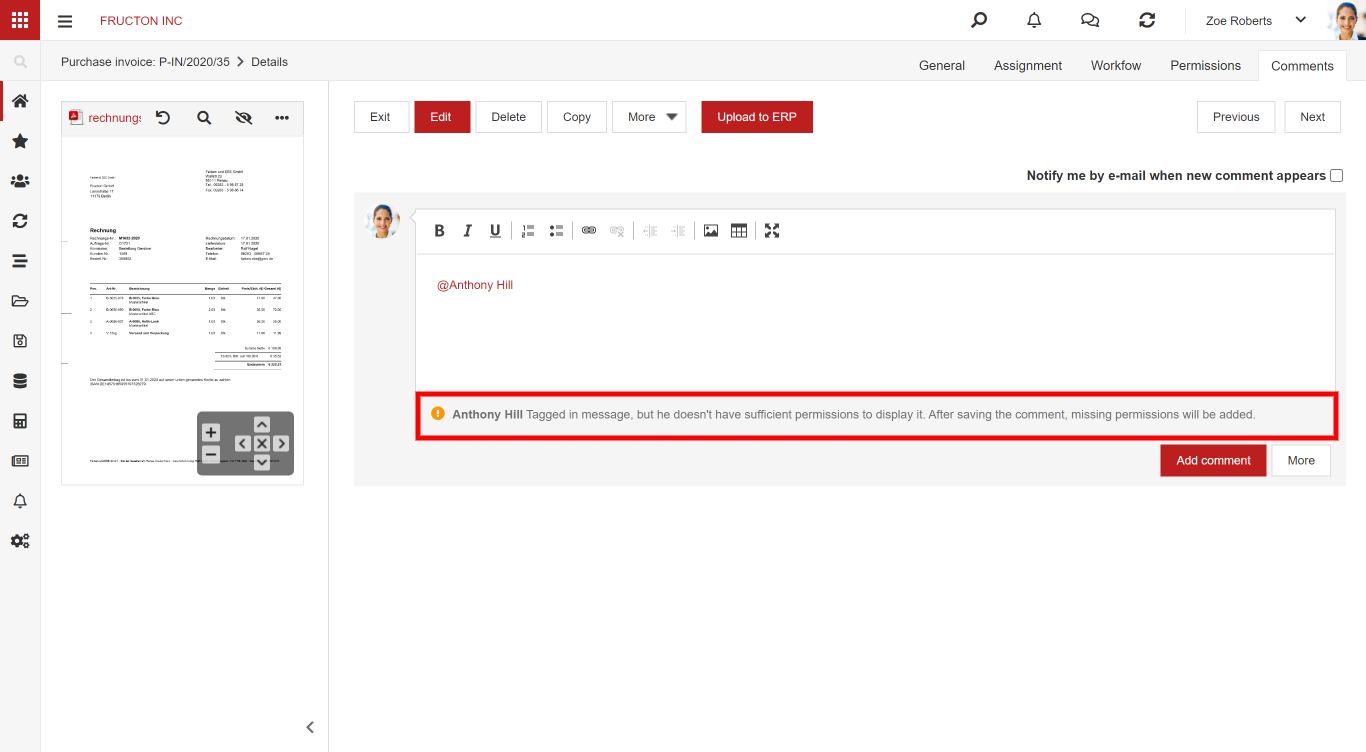
When adding a comment, make sure that the person mentioned has access to the document. It is not the best idea to mention the entire company or the entire department when adding a comment.