


Contextual search engine
The basic mechanism of searching for information is the contextual search engine. It can be found on the top bar of the system under the magnifying glass icon.
 After selecting this option, a screen with a window for entering searched phrases will appear. You can search for single words as well as entire sequences. Additionally, it is possible to search system elements in terms of tags assigned to these objects. It is enough to precede the tag with a # sign. After starting the search – by pressing enter or the magnifying glass icon – you get a list of found items. In the default layout, you see all found elements. The system displays a fragment of the metadata of found objects that contain the searched phrase. This allows you to read the context in which the searched phrase occurs, which makes it easier to find the searched element.
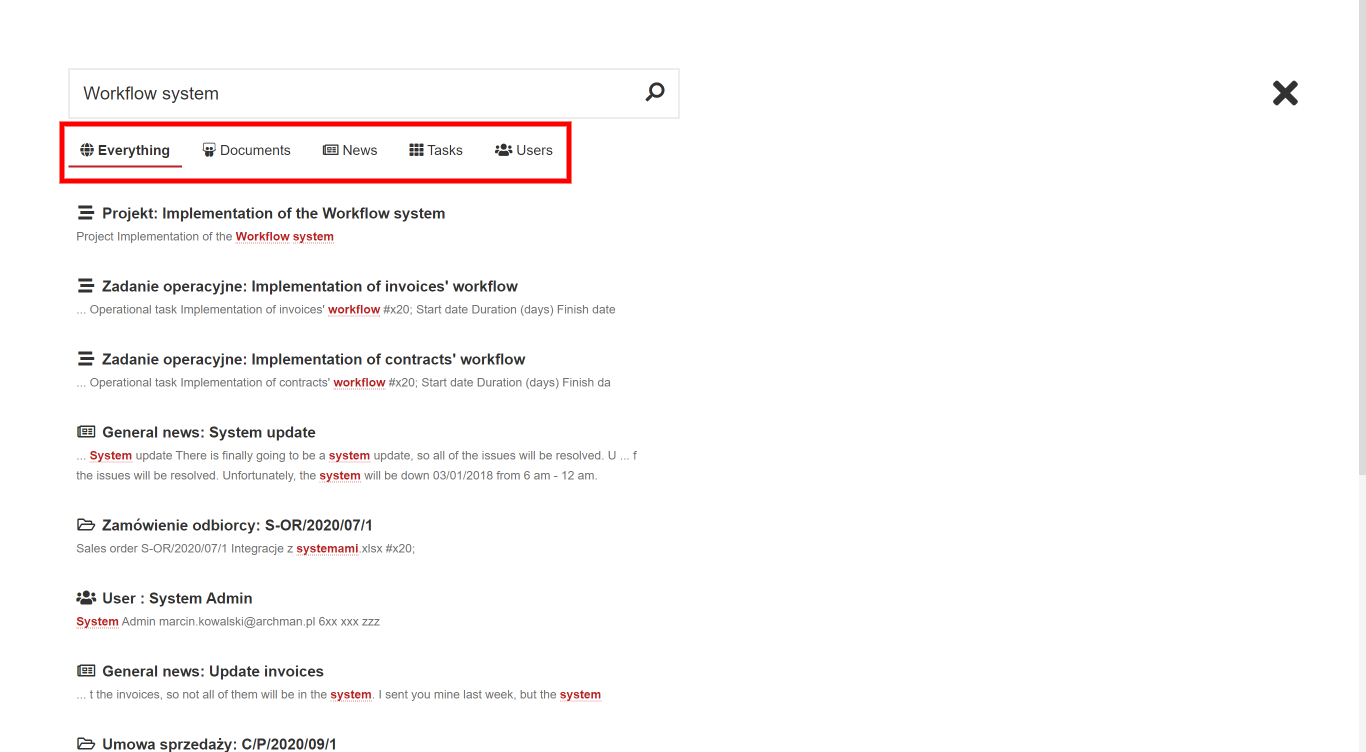
It is possible to quickly limit the scope of the search by selecting the type of element. You can choose from Documents, Files, and Tasks. After clicking on one of the names, the system limits the list to elements to the selected type. As can be seen in the example above, the system searches not only for whole phrases but also for individual words. Where possible, the grammatical variations of a given word are also taken into account.
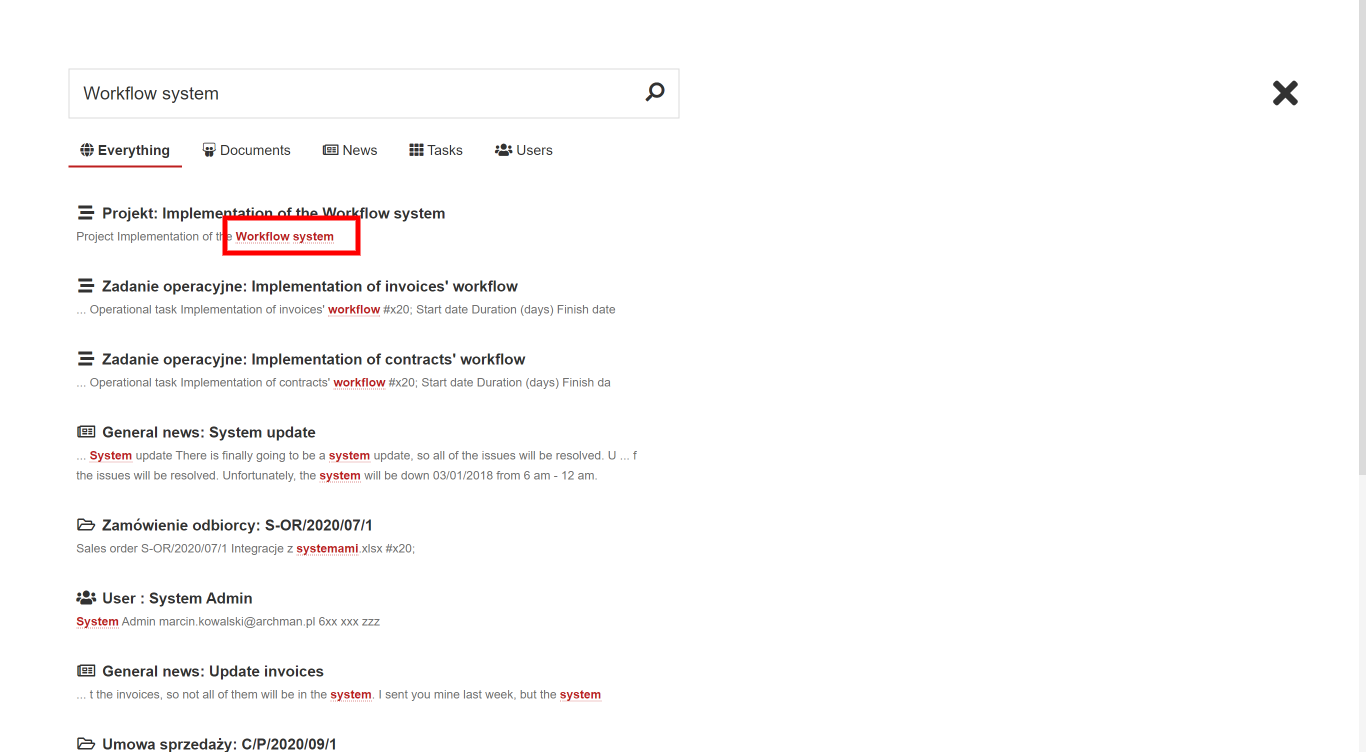
The found information is sorted by most relevant. In this example, at the top, there are elements where the entire phrase was found, below are the elements where the entire phrase is missing, but there are more than one of the words entered. Having found elements, you can go to a specific element by clicking on the signature of the element. Exit the search engine by clicking on the “X” icon.
Lists in the system
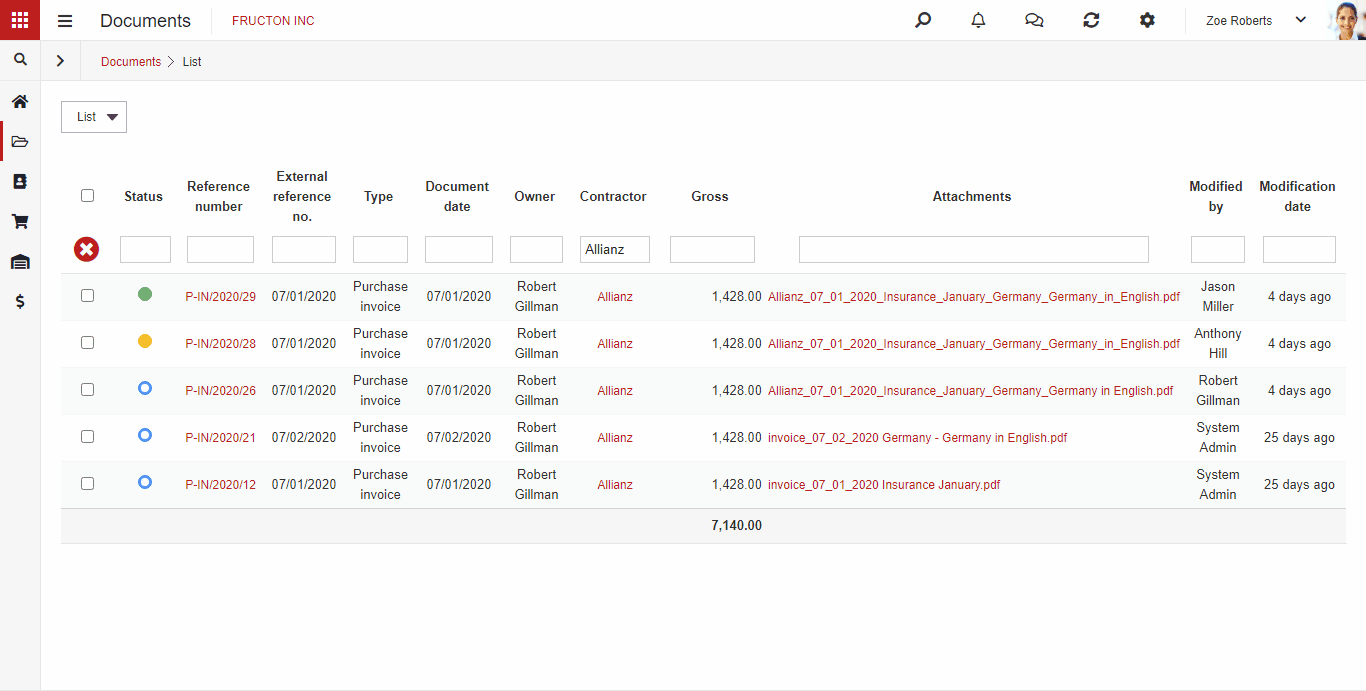
The list is the system element responsible for displaying information in the form of rows. It can take two forms:
the most common table

or a tree used e.g. in an organizational structure.
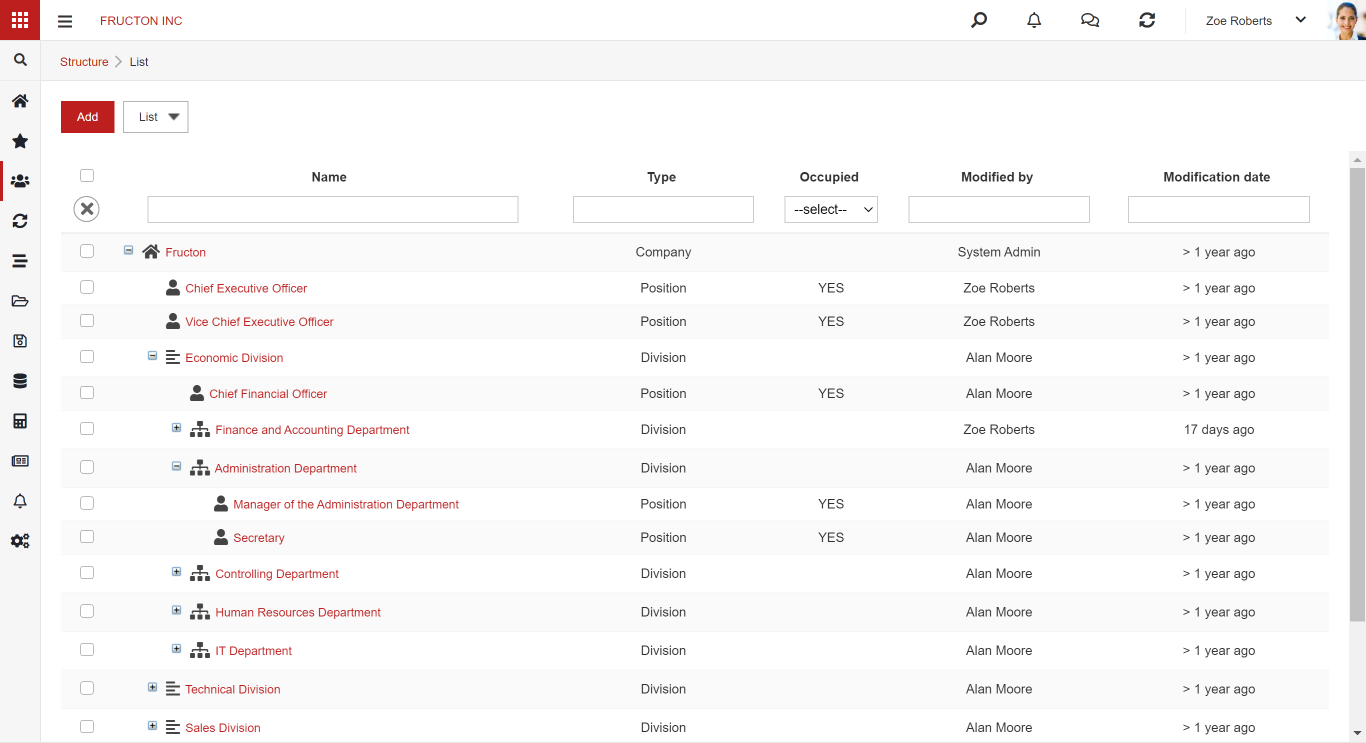 Whatever form the list takes, it has columns and rows of information.
Each list has a standard layout, including:
- Column name
- The fields that allow entering the column filtering value
- A button that turns off column filtering
- Checkbox that allows selecting a row
- Checkbox that allows selecting all rows on the current page
- The field responsible for the number of displayed elements
- Navigation through the list pages
- Information about which page is currently being displayed along with the total number of items in the list

Search in lists
After entering a value into the filter field, the list is filtered depending on the column settings. To turn off the filter, the X in the red circle on the left needs to be pressed.
 Depending on the type of data stored in the column, next to the standard fill-out form there might be buttons that are specific to a certain dataset. For example, for a column that holds dates, there will be a calendar:
 The data on the list can be sorted by the selected column. After clicking on the name of the column, it is sorted from the highest to the lowest value, e.g. for written data, it will be in alphabetical order. When pressed again, the filtering is reversed, i.e. from Z-A or from smallest to largest. To remove the filter, press the X in the red circle.
Customizing lists
Column settings
You can adapt each of the lists in the system to your own needs or preferences. It is important to remember that these settings only apply to your account, other people will have the standardized look at the list.
To make the changes:
STEP 1: Each list has an option List -> Column settings.
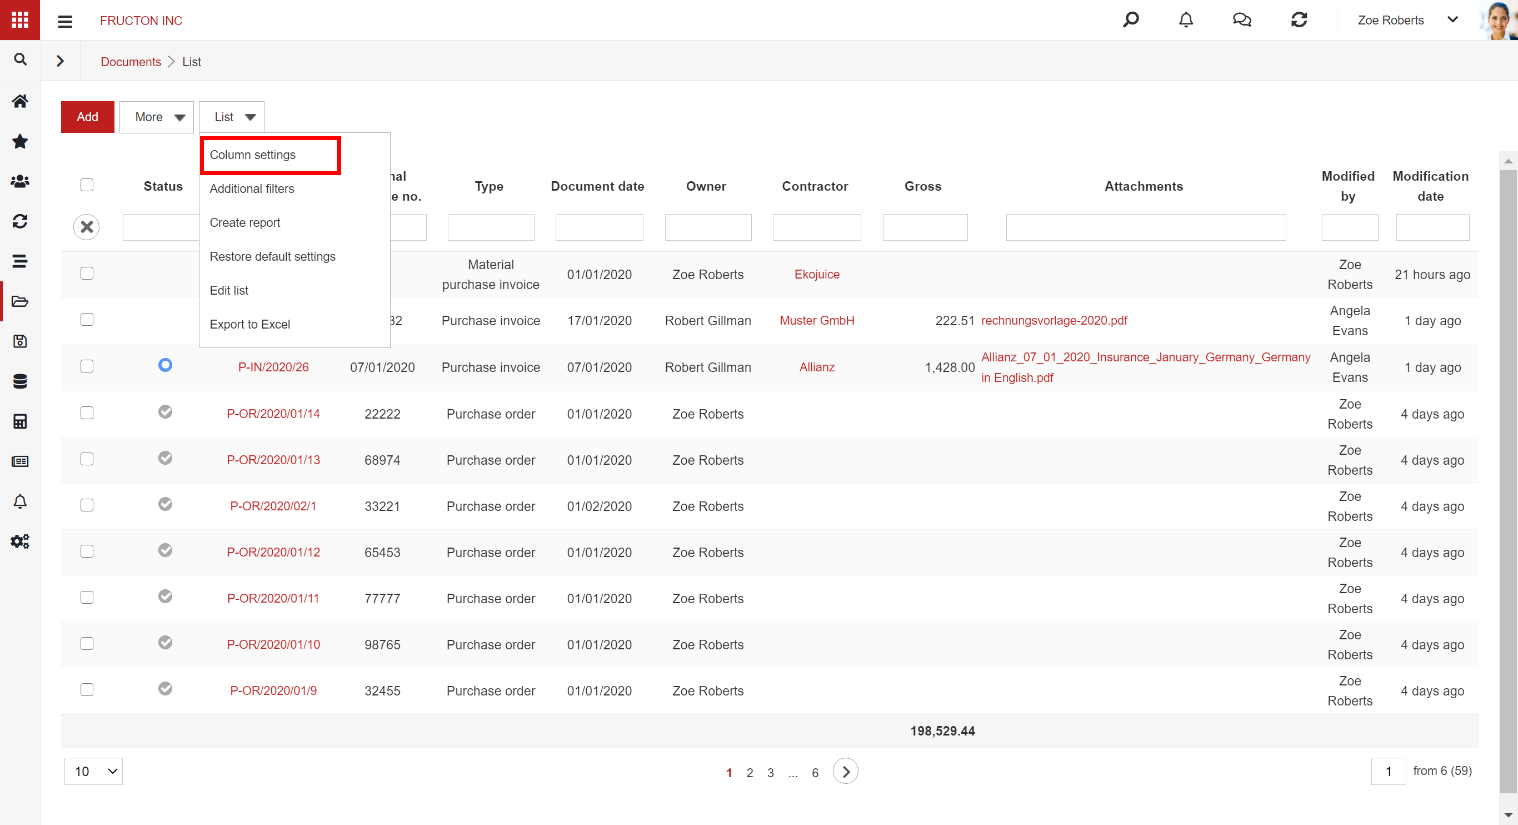 STEP 2: Activating this option allows selecting the columns you want in the configuration. You can change the order of columns, show or hide them, etc. All the changes need to be saved. For example, there are several options available for the Owner field.
At this stage, you can also change the way column filtering works. However, this option is rather intended for more advanced users. It’s best to leave these settings unchanged.
ATTENTION! All changes in the list are visible only to the logged-in user for whom the changes were made. Each user can have their configuration of columns.
Restoring default values
If you want to restore the default appearance of the list, select Lists> Restore default settings from the menu.
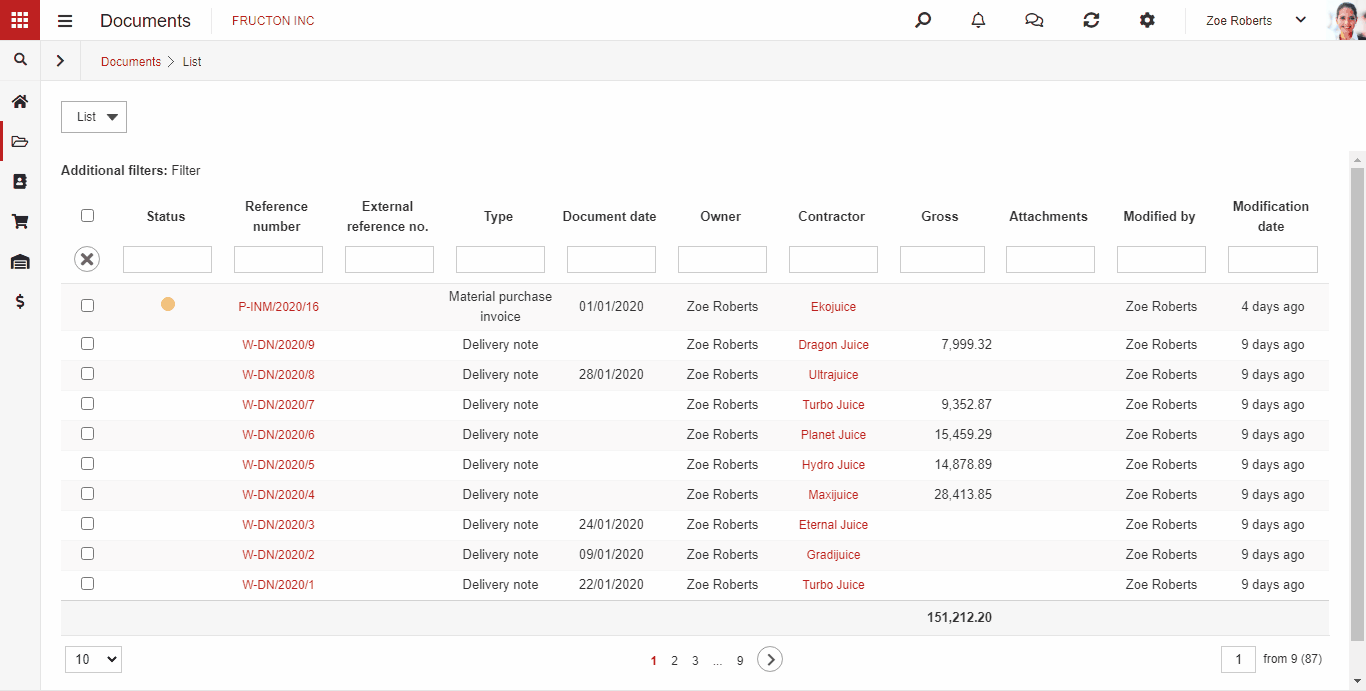
Additional filters
STEP 1: Each list has the option List -> Additional filters.
 STEP 2: Running this option allows you to create your filter. At the beginning of creating the filter name and then press the add button, which adds a field that allows you to enter the filtering condition.
STEP 3: Select the name of the column by which the value is to be filtered and the value operator.
STEP 4: Setting the value, for example, after enabling the filter, the documents owned by Ewa Bielawska should appear, for this purpose, set the value to Constant and enter Ewa Bielawska in the last field. After adding a condition, you can turn on the filter by pressing the Apply button or add another filtering condition by pressing the Add button.
Removing filters
STEP 1: Go to: List -> Additional Filters.
STEP 2: The currently used filter will be displayed. To turn off the filter, press the button Remove. The settings will be saved and could be changed in the Additional filters field.
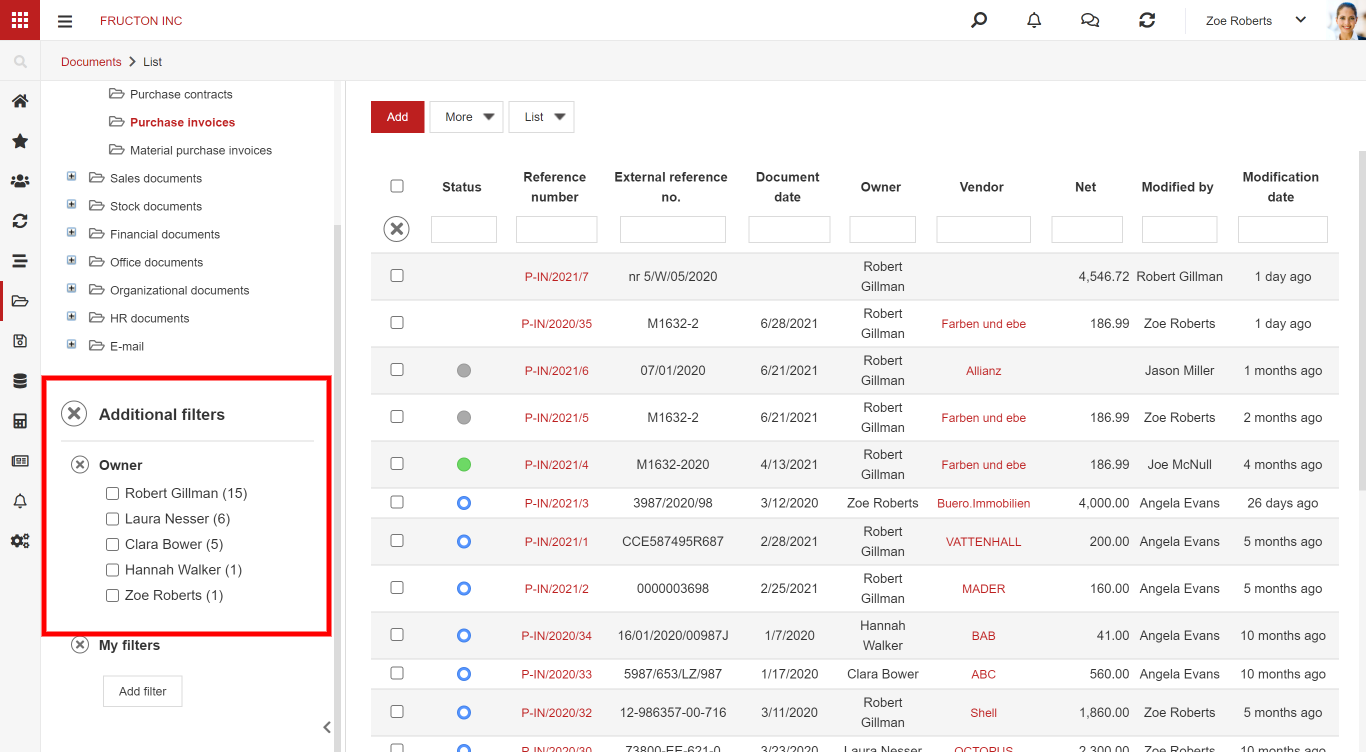
Additional filters
There are often additional filters in the list’s configuration. They are placed in the panel on the left side of the list. Not every list possesses this panel, so not every list has additional filters available.
This filters are defined by the system administrator or system implementer. The user gets a defined set of filters.
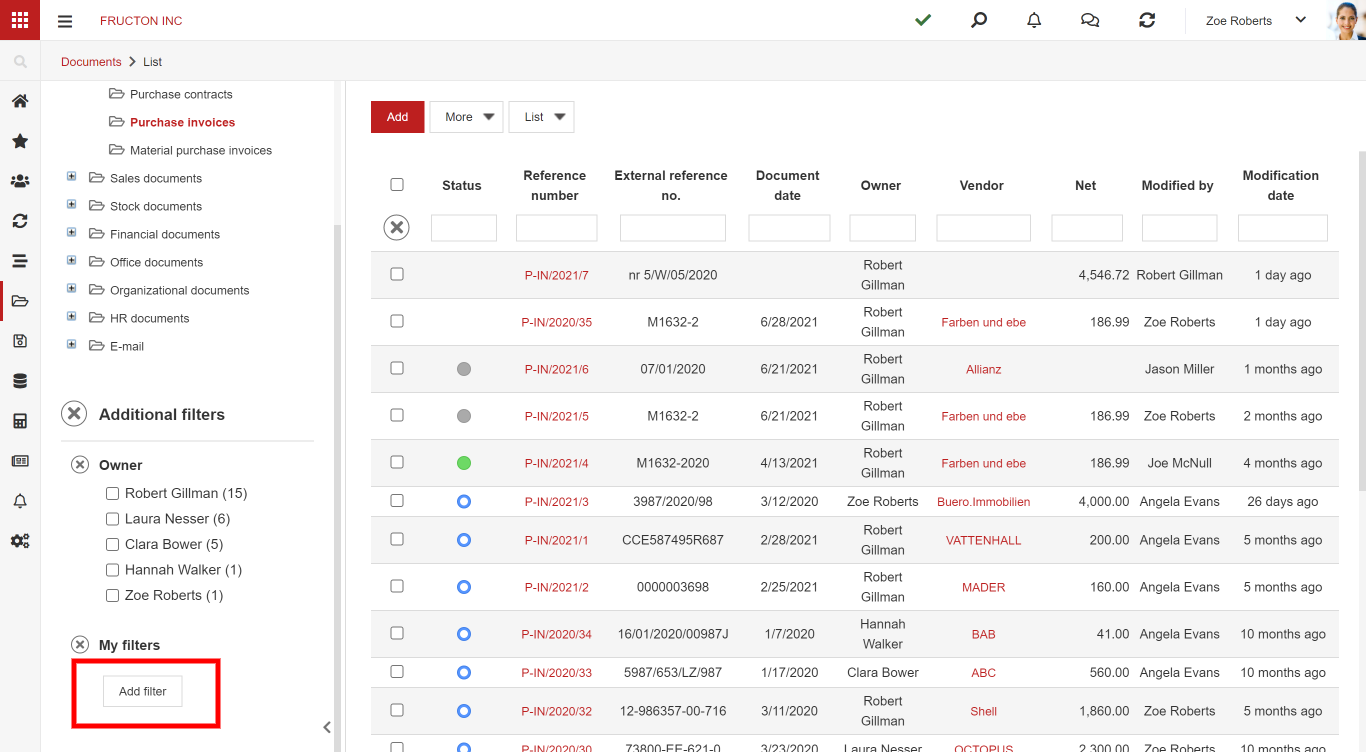
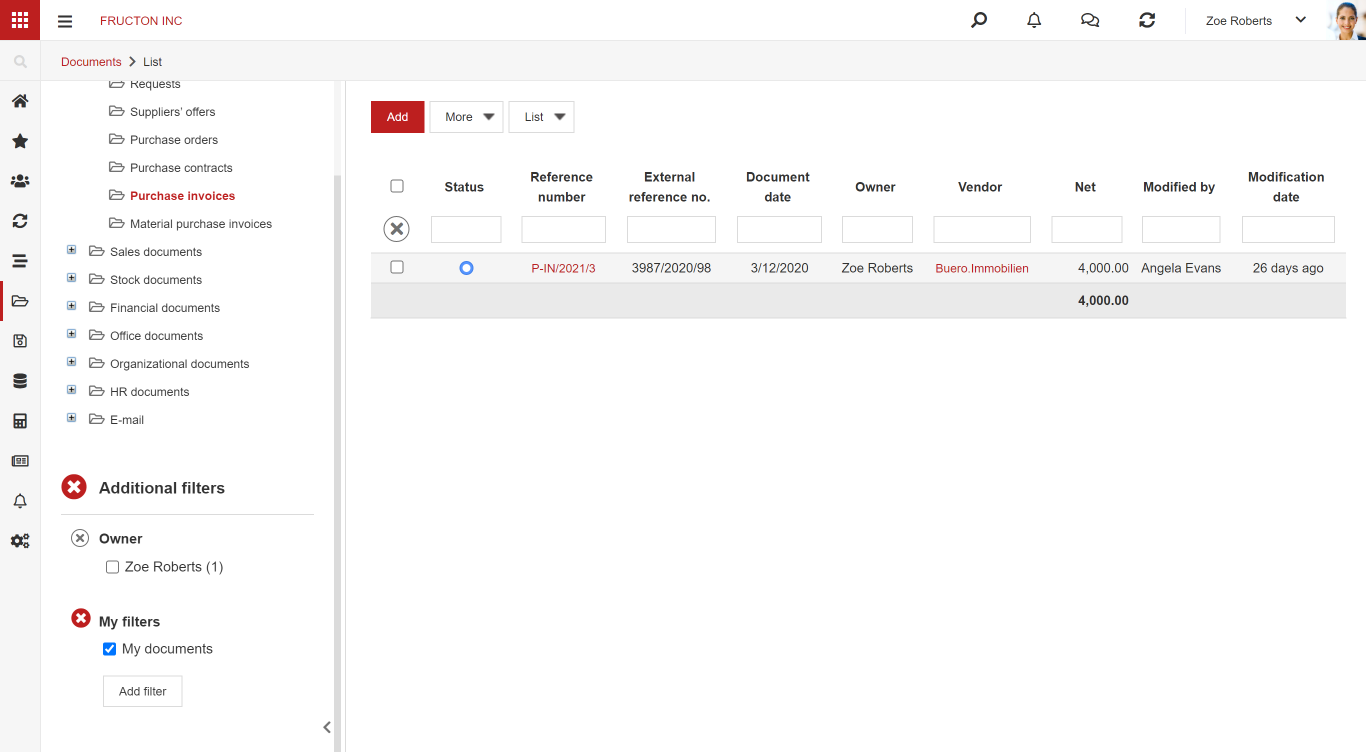
My filters
A user can add simple filters that are functioning on the same basis. The possibility to configure these filters is limited compared to the capacity to which the administrator can edit them. However, this functionality can be useful. You can add your filters by clicking the Add Filter button, which is placed at the bottom of the filter list.
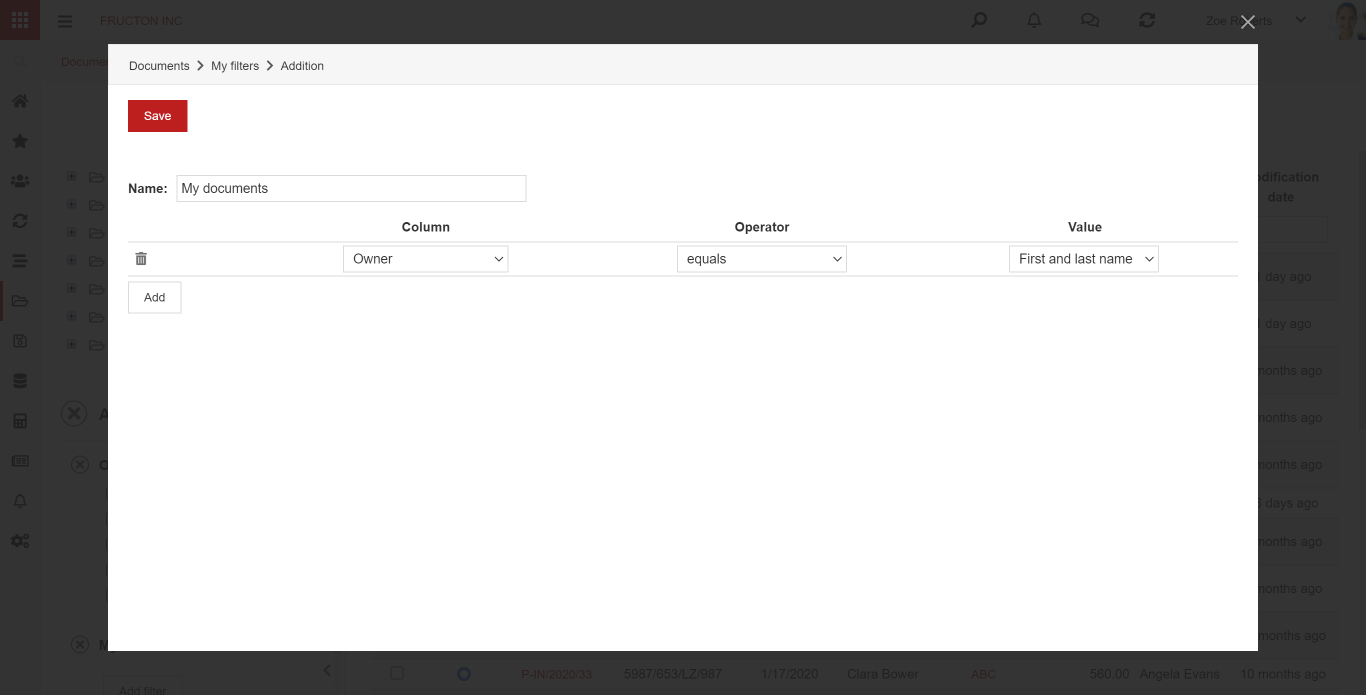
After selecting this option, a window allowing to define the filter will appear. Enter the name of the filter – this name will be displayed on the filter list, so it is good to choose a name that will describe the filter operation and the filter definition. You can choose a column on which documents can be filtered, an operator, i.e., a value comparison method, and a value. You can enter a static name, e.g. the name of the contractor if you want to have quick access to documents related to this contractor, or one of the two dynamic values – the name and surname of the logged-in user and the login of the logged-in user. In the above example, a filter is defined that finds all documents in which the logged-in user is the owner.
After saving the filter, you have access to it from the list:
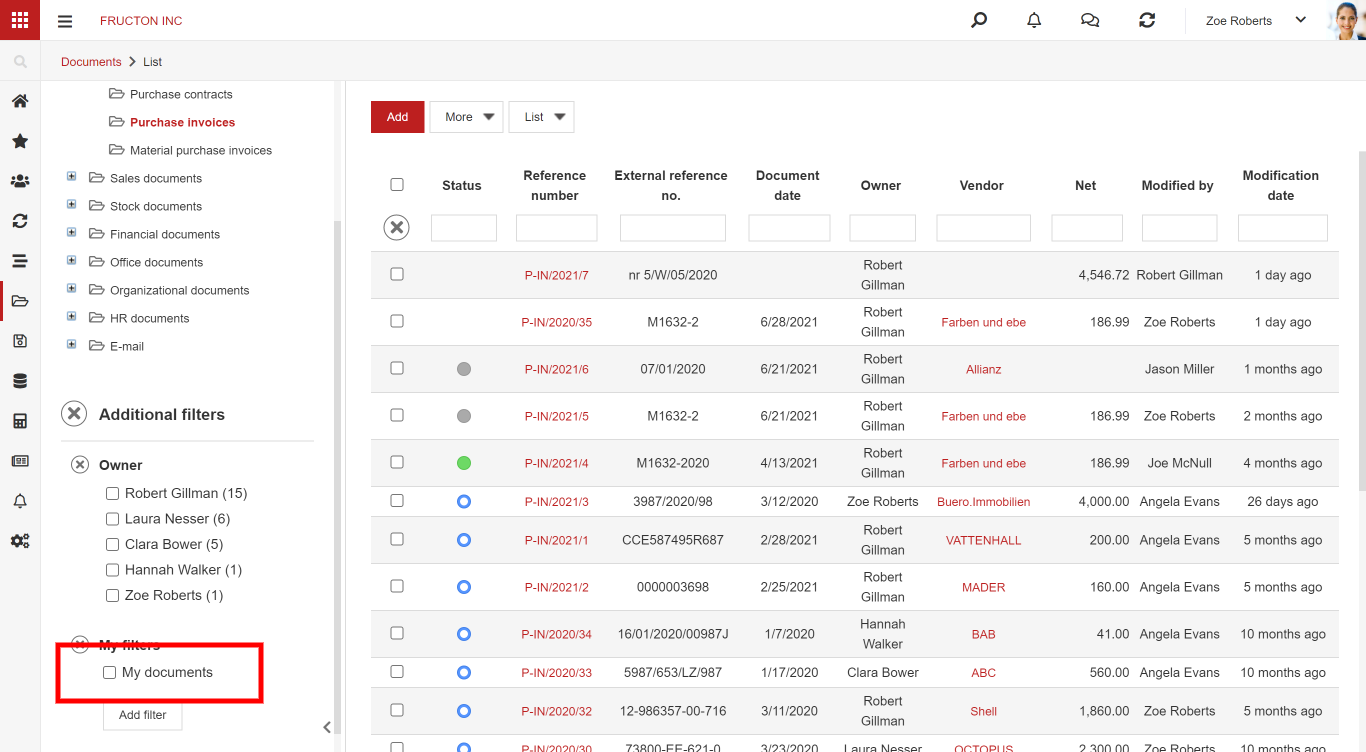 After selecting a filter, only the documents of the currently logged-in user are displayed on the list.
List export
The last item on the List menu is the Export to Excel option. After selecting it, an Excel file is saved containing all the rows from the list.

All rows from the list are exported, so if any filters have been selected or additional filters have been defined in the list configuration, only those rows that are on the filtered list will be exported.