


What is WebDAV
WebDAV (Web-based Distributed Authoring and Versioning) is an HTTP protocol extension that allows you to access and manage files on a Web server. This protocol can be used by web applications such as NAVIGATOR to edit in Word or Excel documents stored in the system as well as by the operating system itself. Users can connect a remote folder with shared files to their local device. Depending on the type of the system, the operation is called Mapping a network drive (Windows), Connecting to a server (macOS), or Mounting an item (Linux).
Connecting a remote resource is a more convenient and less resource-intensive way to access shared files in a company than, for example, using a corporate cloud (OneDrive, DropBox, etc.). It is a more beneficial solution, especially on mobile devices that are not connected to a high-speed network. Another advantage is the integration with the NAVIGATOR system, which provides not only the files and folders structure but also the structure of documents.
Is there WebDAV in my NAVIGATOR?
WebDAV configuration is a separate process from NAVIGATOR configuration. Please consult your system administrator whether such service is available and how you can access shared files.
The first necessary information to properly configure WebDAV access is the server address. Usually, this address is the same as the address at which NAVIGATOR is available, but it may differ. Secondly, it is important to set up the method of authorization within the system. The service is associated with Active Directory, so it is usually possible to log on to the WebDAV server with the same credentials as to the company computer. It may mean that access to WebDAV requires different credentials, e.g., a different user name, then access to the NAVIGATOR system. Please consult your system administrator about these credentials.
How to configure WebDAV
Configuration on a company computer
The easiest way to configure WebDAV is on a company computer paired with the company network. If the computer is connected to a domain, you only need to add the WebDAV service address.
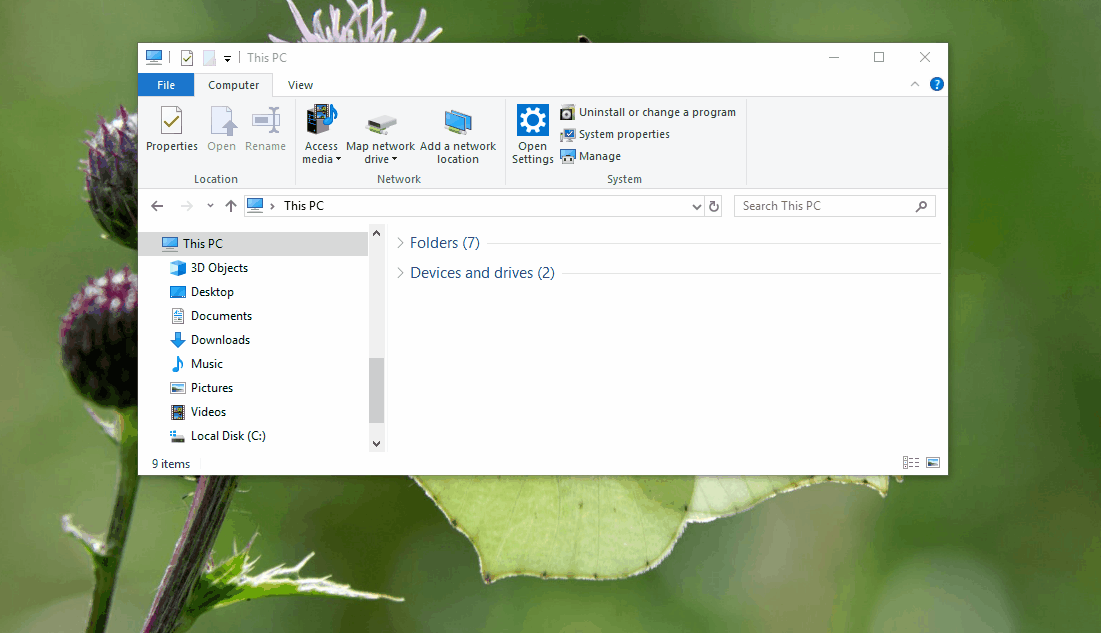
Open File Explorer, find This PC and then select Map network drive. There are two fields to fill. Select a drive letter under which the resource will be visible in the system and enter the address of the WebDAV service. You can also choose the Reconnect option while logging in so that when the system is restarted, the tool will be automatically connected. Note, however, that the system will ask for a username and password each time you connect. You can prevent it by checking the Remember my credentials option.
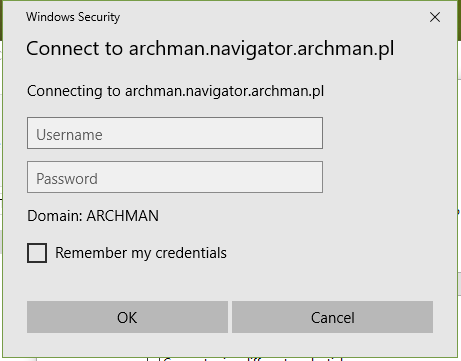
As you can see on the sample screen, the system has correctly suggested the domain name. All you have to do is enter your username – the one you use to log into your computer – and your password.
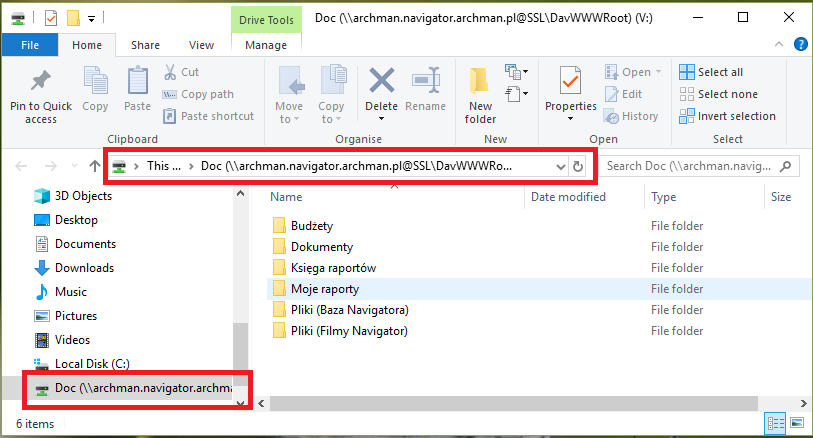
After clicking Finish, the resource is connected. If everything went smoothly, we have a new item in File Explorer, through which we can access files on the server.
As you can see, the folder structure corresponds to the Files structure in the application and folders related to Documents, Budgets, and Reports. Keep in mind that the system checks the file permissions, so we have access only to those items to which we have access in the NAVIGATOR system.
Configuration on a private computer
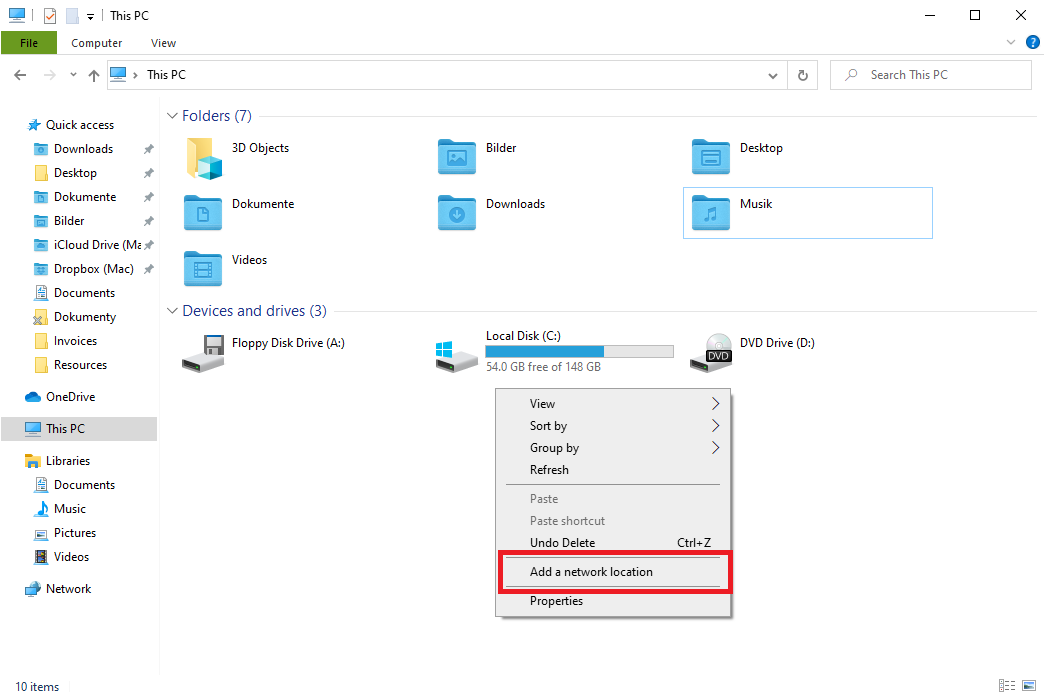
If you want to configure WebDAV on a computer that is not connected to the company domain, the easiest way is to add a network location by clicking right mouse button in This PC.
The wizard will guide you step by step.

There will be probably only one option but you have to click on the “Choose a custom network location”

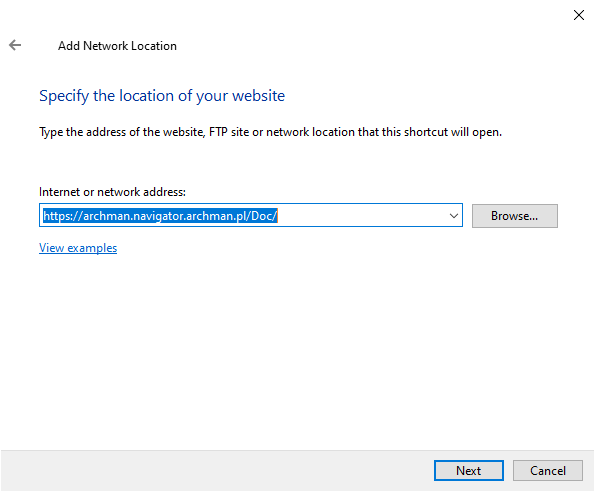
The only information you have to provide is internet address.
After clicking Next system will ask you for credentials to WebDAV server. Only note that you need to change the authentication information. On a local computer, the system will usually suggest a local user account, which is not compatible with our company account.
After opening a dialog box to enter credentials, select More options and then Use another account. The system suggests a domain name, which you should change into a company domain. It can be done in two ways: by specifying the domain name before the user name according to the DOMAIN_NAME\user_name scheme or by specifying the user name according to the user_name@archman.pl scheme where archman.pl is the domain name. The domain name and user name information can be obtained from your system administrator.
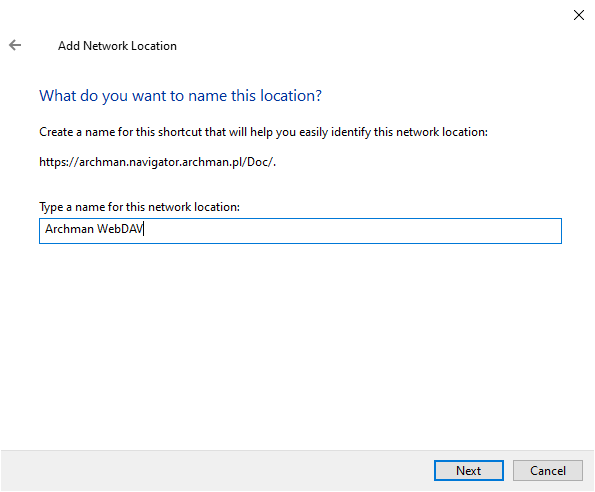
Optionally, you can add the name of the resource
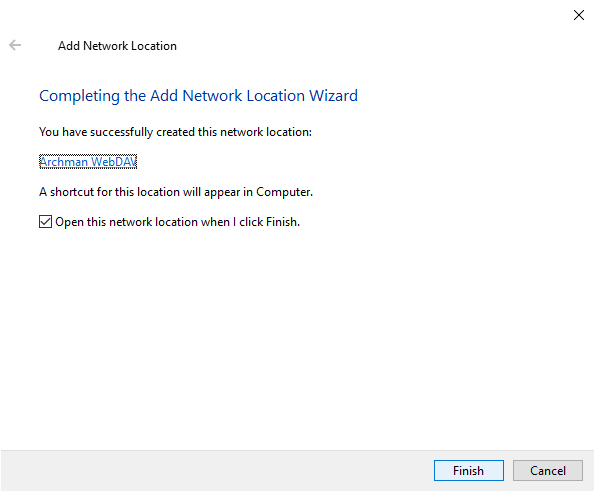
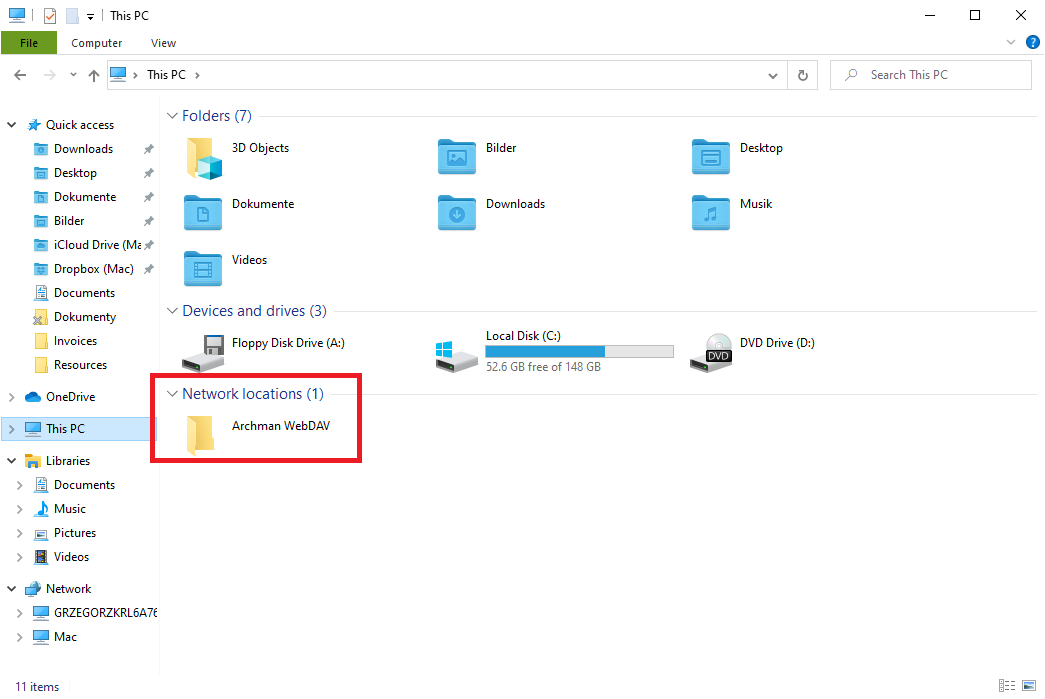
After finishing the item will appear in This PC in Network locations section.
Configuration on Apple computers
On devices running a macOS, connecting a remote resource is done through Finder. When you start this application, you will find the function Connect to Server (⌘k) in the Go menu.
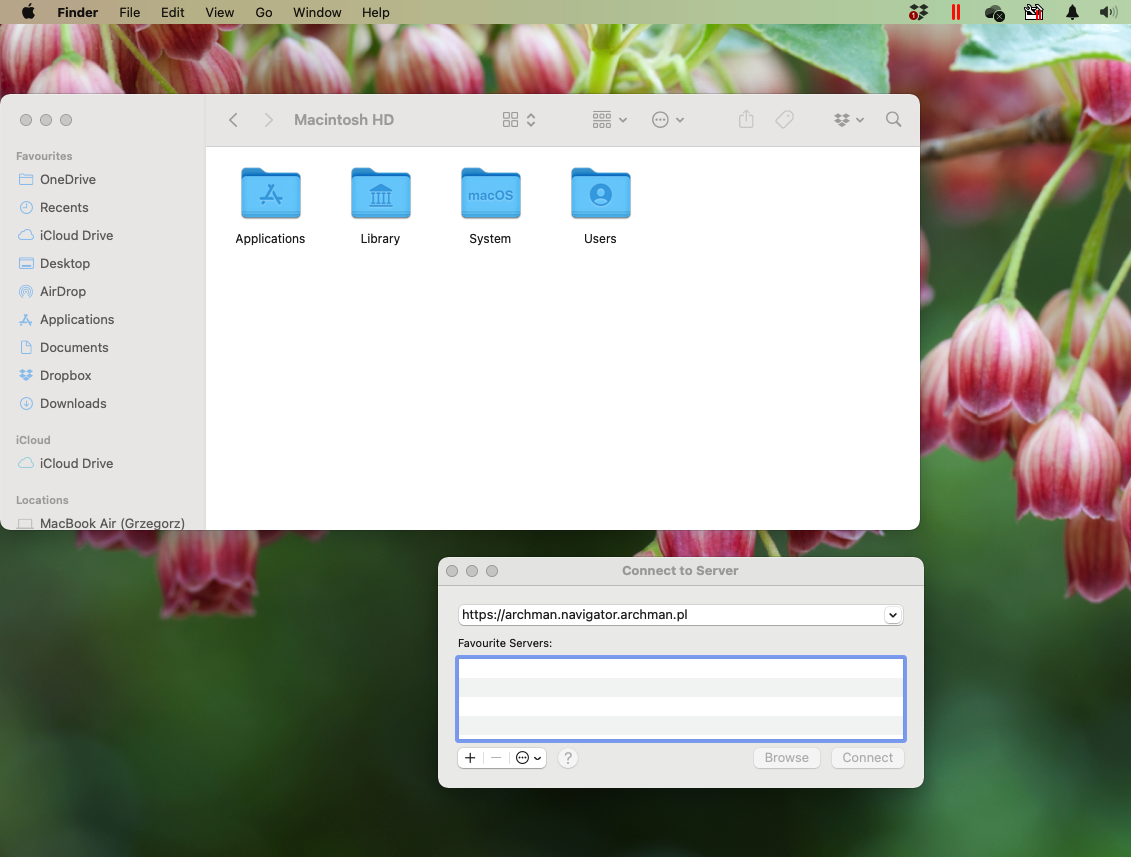
After filling in the field with the name of the WebDAV server, click Connect.
The system will ask for a username and password.
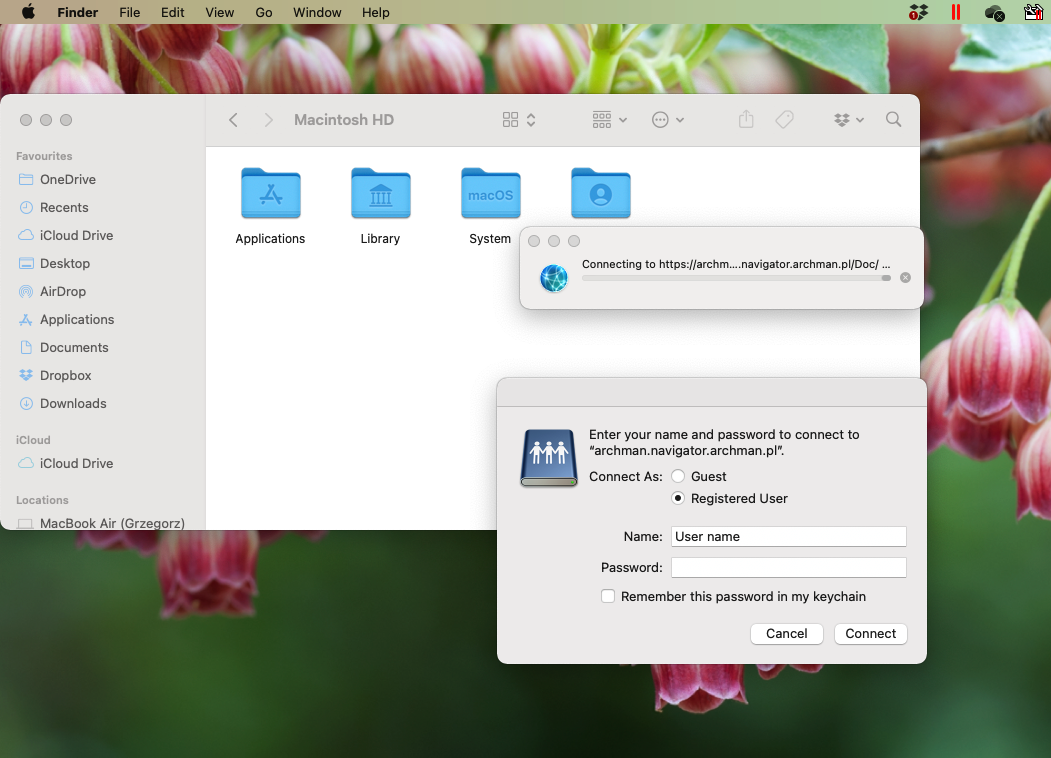
Note: you must enter a user name, including the domain name in the format user_name@domain.name.com. We can store the credentials in the Keychain , so that the next time you connect to the resource, you will not need to enter the credentials.
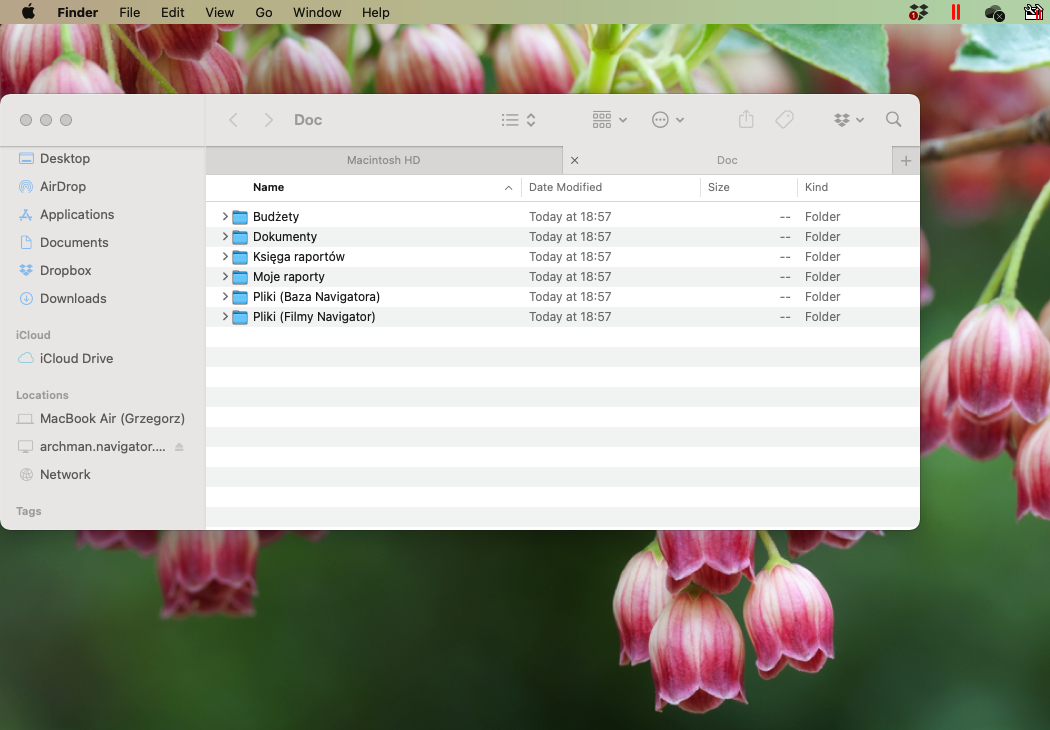
After providing the correct credentials, we have access to the files from the server. The resource is located in the Finder in the Locations section.