


Documents are an essential part of any application in the Navigator system. Documents processed in the system can be accessed both through a dedicated application, e.g. e-mail, and through the Documents application

Addin a document
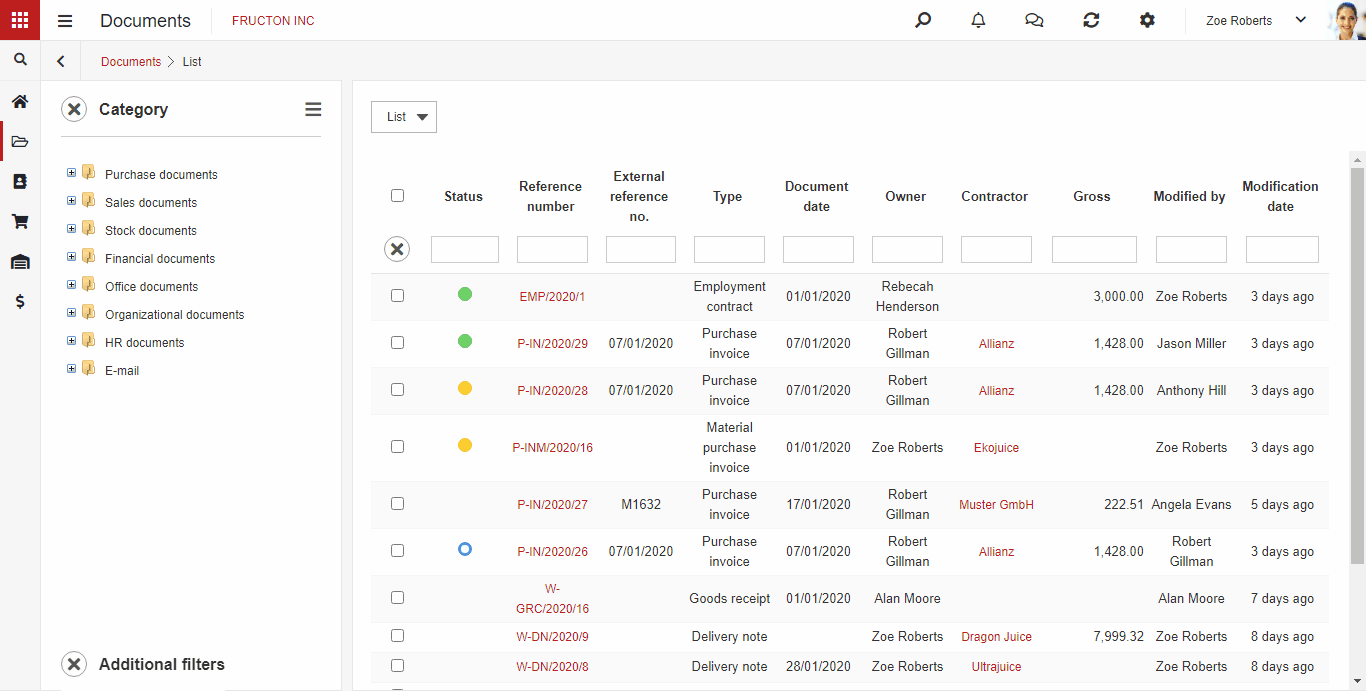
After entering the documents application, we see a list of all documents to which we have access shown from the most recent. It is worth noting that at this level, we usually cannot add documents. To add a document, select the category of documents.
Document categories
What is a document category? The easiest way to imagine it is as a binder in which documents of one type – invoices, for example – go. In the Navigator system, we can build a hierarchical category structure. The layout of the categories makes it easier for us to search for documents. In addition, user permissions can be assigned to the category, which allows us to better manage access to documents. After selecting the category, you will be able to add a new document.

We can enter an existing document by clicking on its own number or add a new document.
Typical document structure
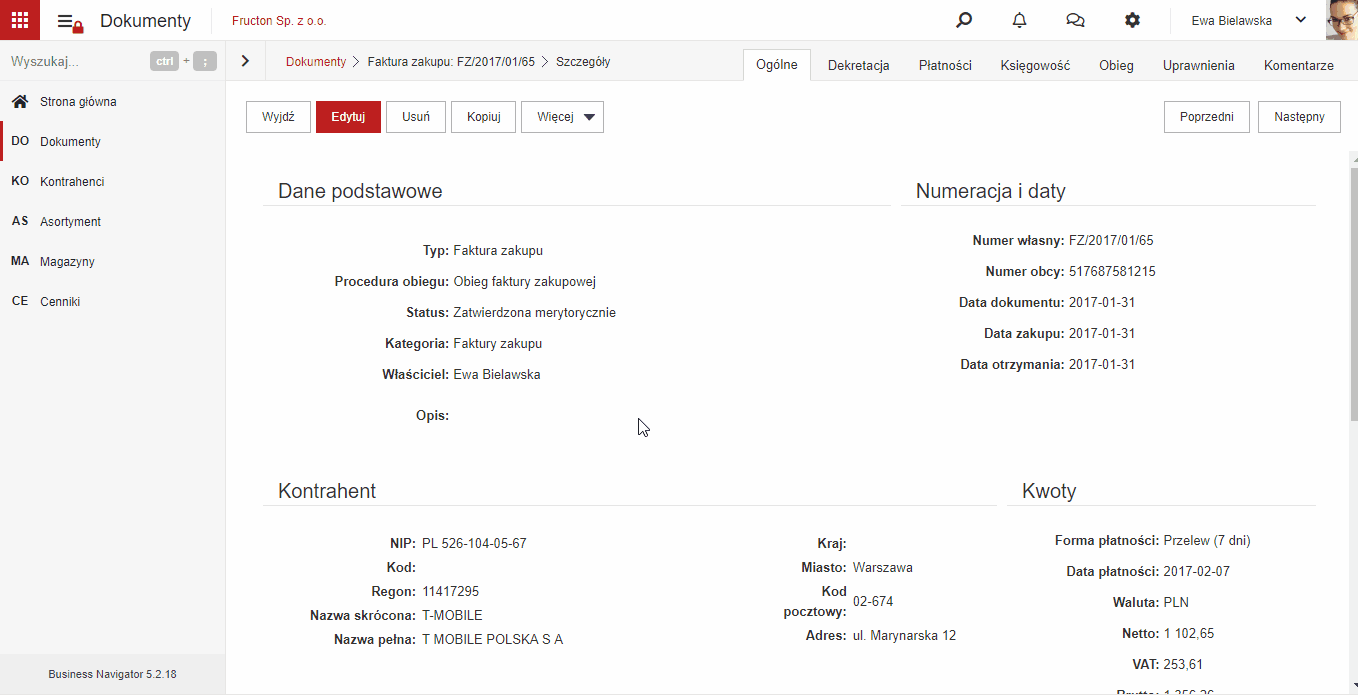
After adding a new document, the document form will appear. Let’s see what a typical document form looks like on the example of a purchase invoice. It is one of the most extensive types of documents in the system, some elements may not exist in other types.
Tabs
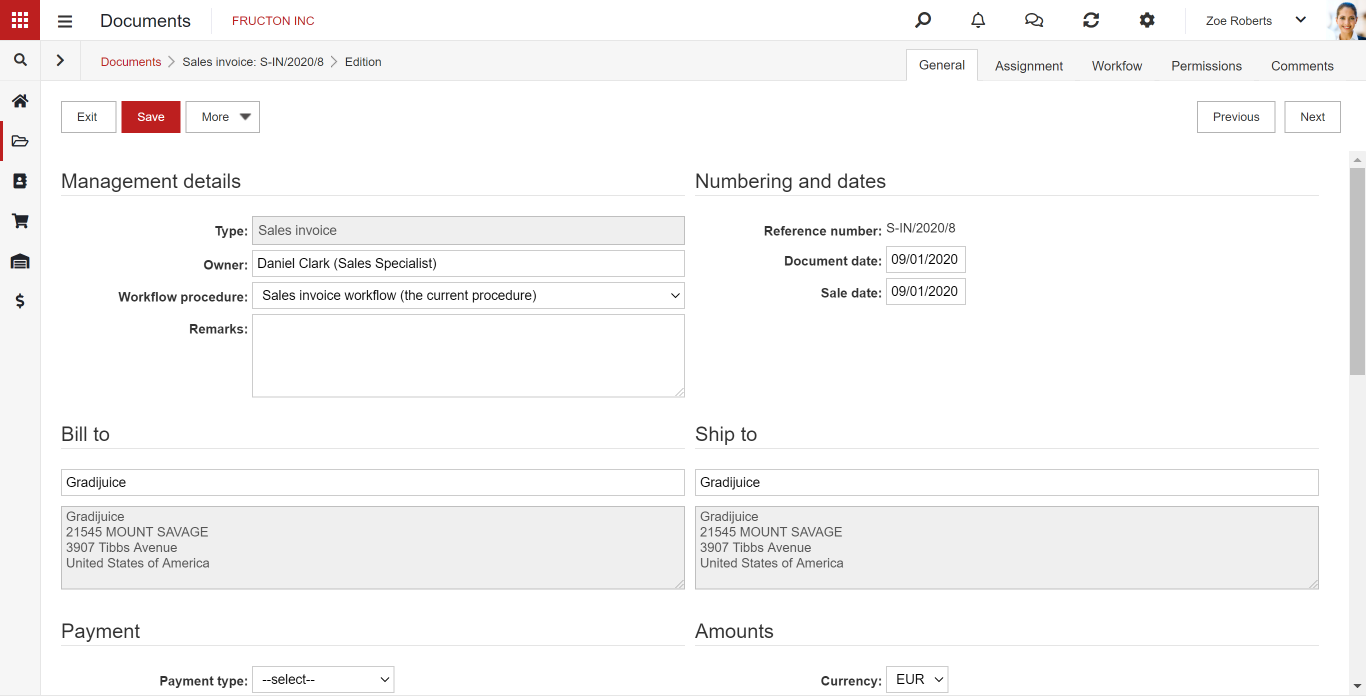
Usually, document forms have several tabs. Of course, you could create a form without tabs, but it would be very inconvenient to use. Grouping the document options into tabs significantly increases the convenience of using the system.
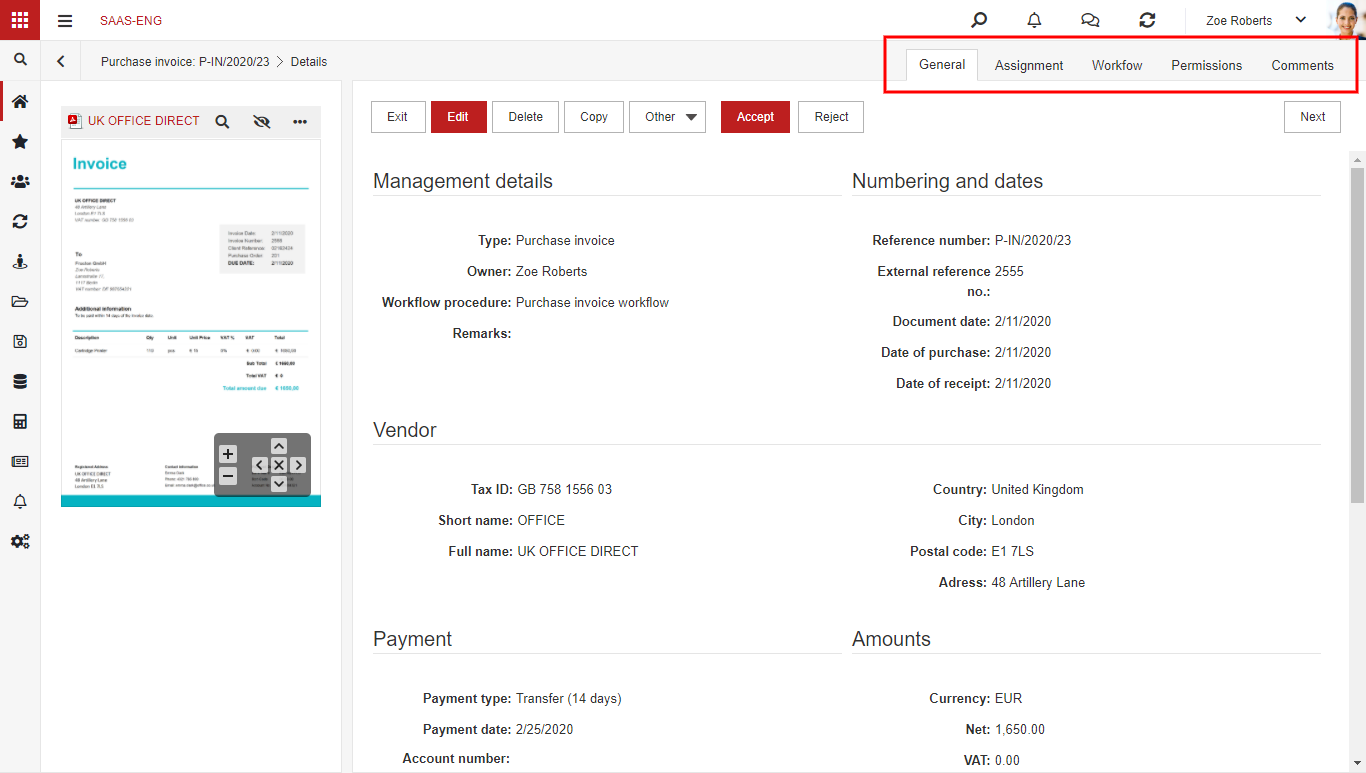
Each document has at least one tab. As a rule, it is called General. The Workflow, Permissions and Comments tabs are also frequent. On the purchase invoice document, we also see additional tabs dedicated to this type of document or for the category of accounting documents (Assignment). Switching between tabs is done by clicking on their name. It is worth noting at this point that we can switch between tabs without losing data. When filling in the Assignment tab, we can easily switch to the General tab to check something without worrying about losing our data.

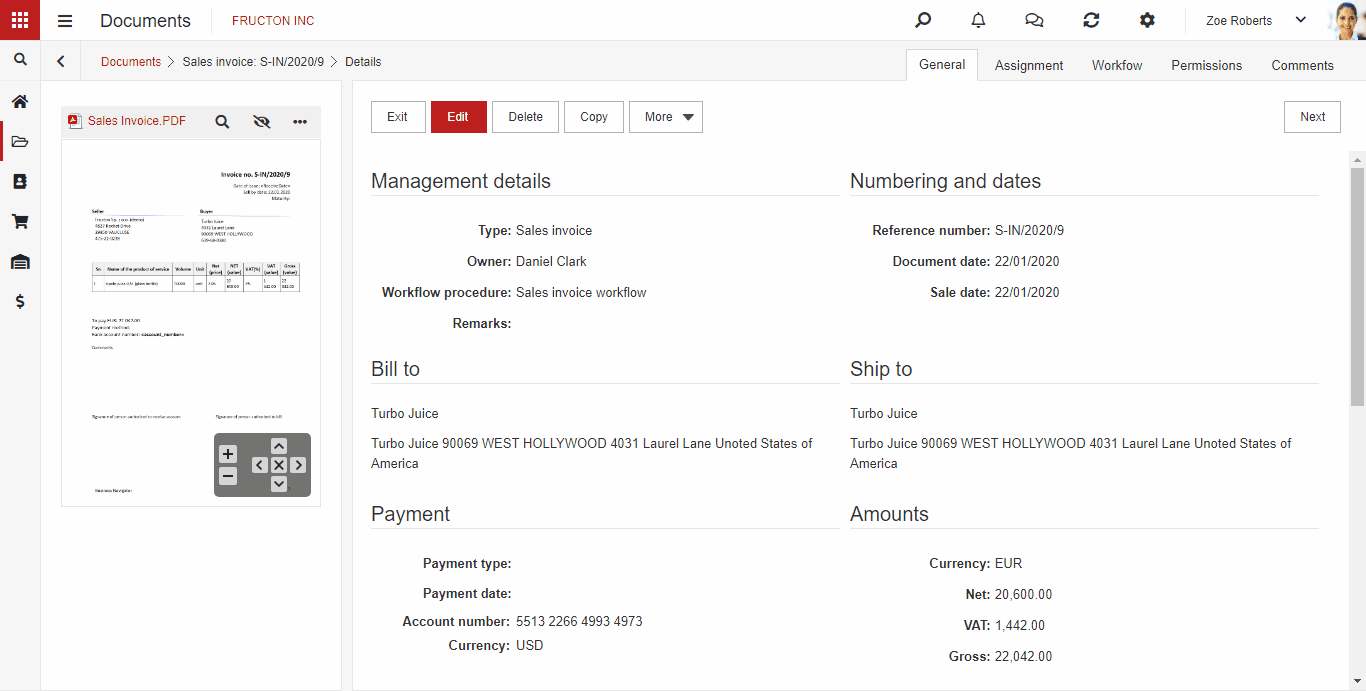
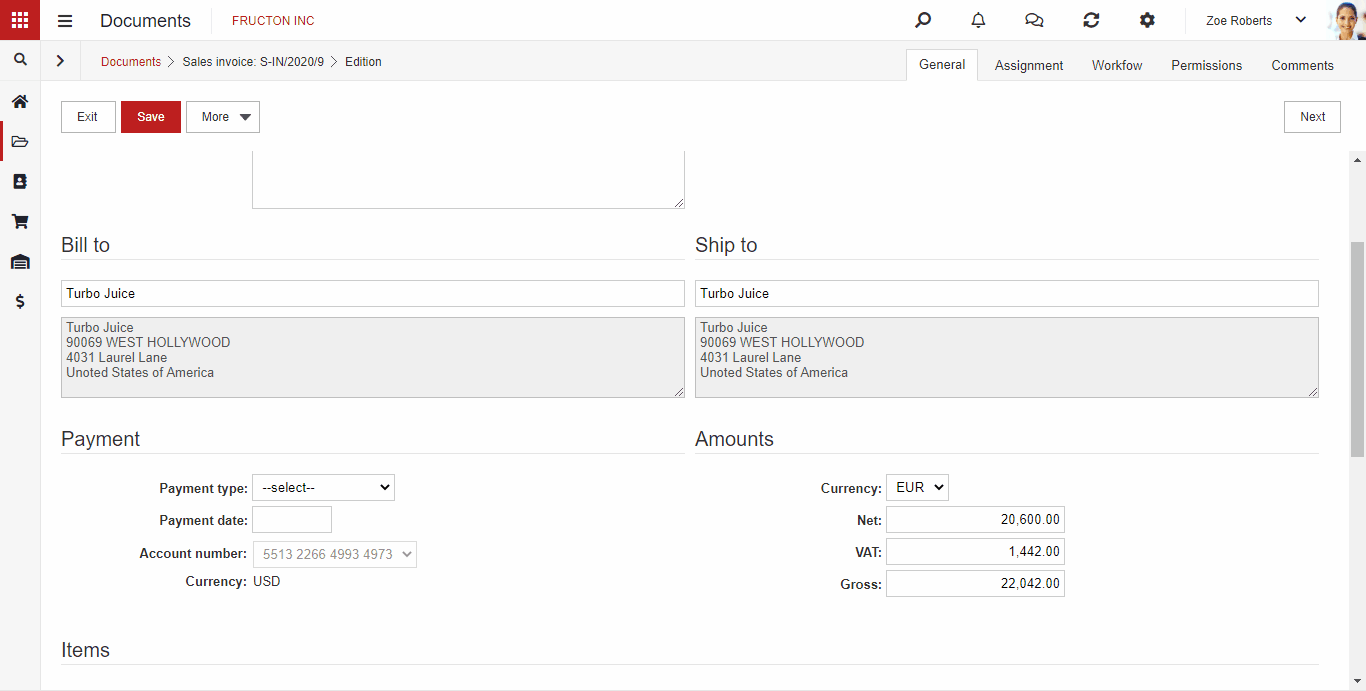
General
On this tab, each type of document contains basic information for a given type of document. On the purchase invoice, we can find here the Vendors’ data, dates, amounts or a list of items from the invoice. Some elements are displayed in red – this is how the system indicates required fields. If we do not complete them, the system will not allow us to save the document.
Workflow
Most types of documents in the system have a defined workflow procedure. It tells you what to do on the document and who is to do it. In the Workflow tab, we can preview what activities have been done.
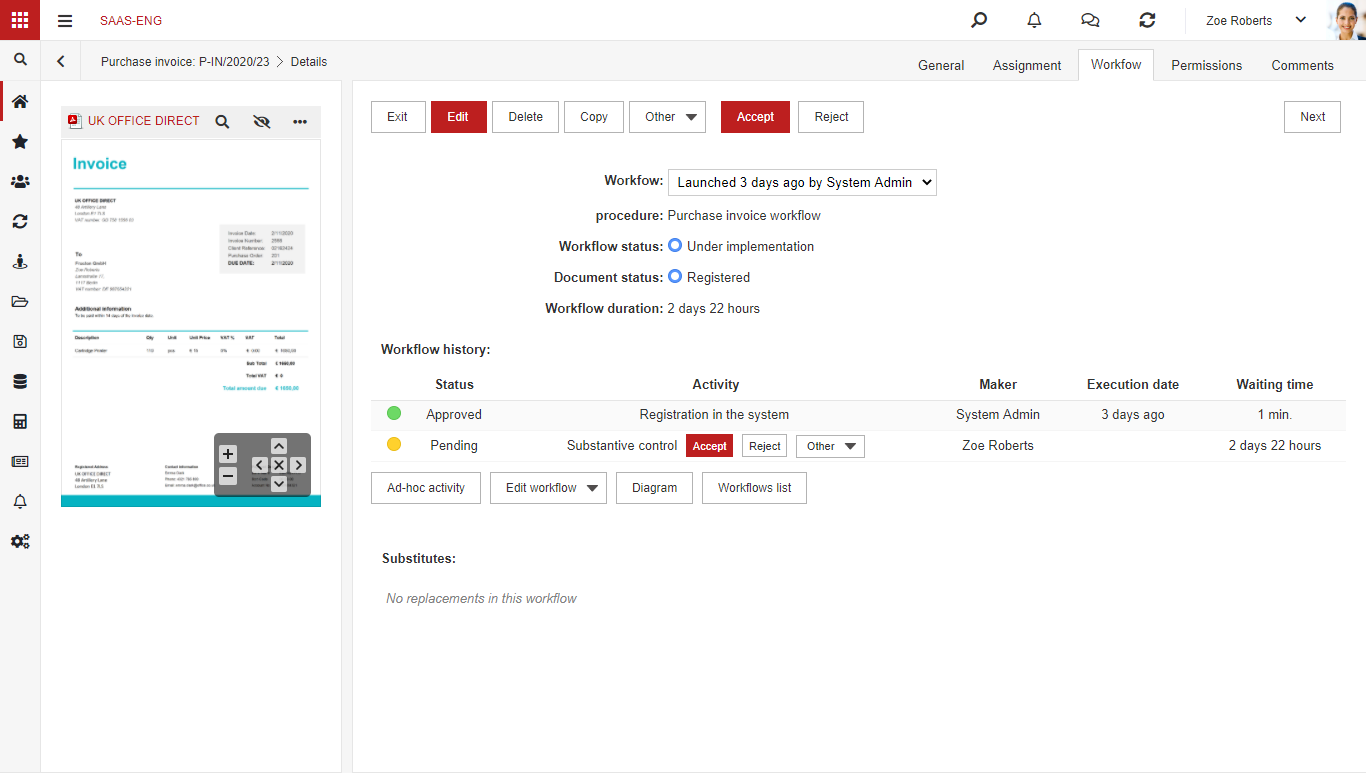
After creating the document, the Workflow tab is empty. You must fill in the required fields and save the document – usually after these actions, the workflow procedure is automatically started. However, there may be times when you need to start the procedure manually.
In some cases, the document type has more than one workflow routine assigned to it. The selection of the workflow procedure is usually found in the General tab.
Permissions
On the permissions tab, we can see who has permissions to the current document. If we are the owner of a given document (i.e. we have created it), we have the right to manually assign permissions to the document.
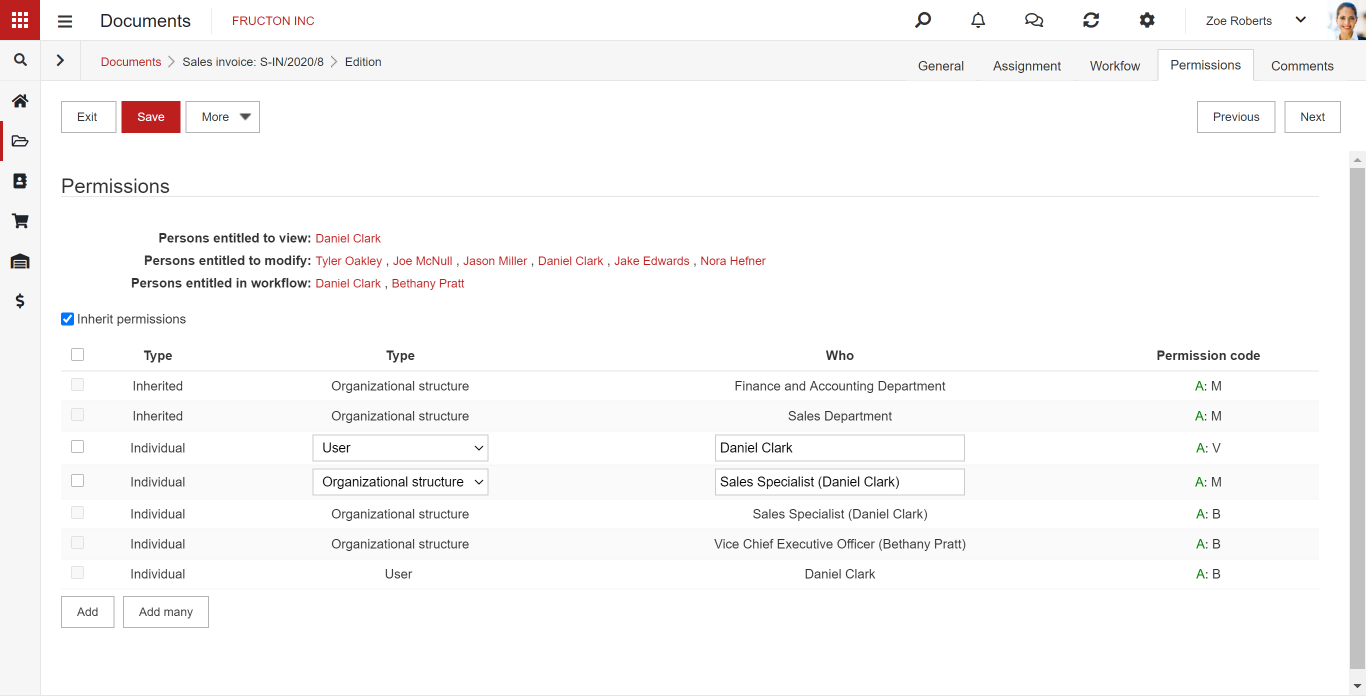
We can add permissions for a specific user, for a user group defined in the system, or for an element of the company’s organizational structure. We can choose between two permission options: modify or read.
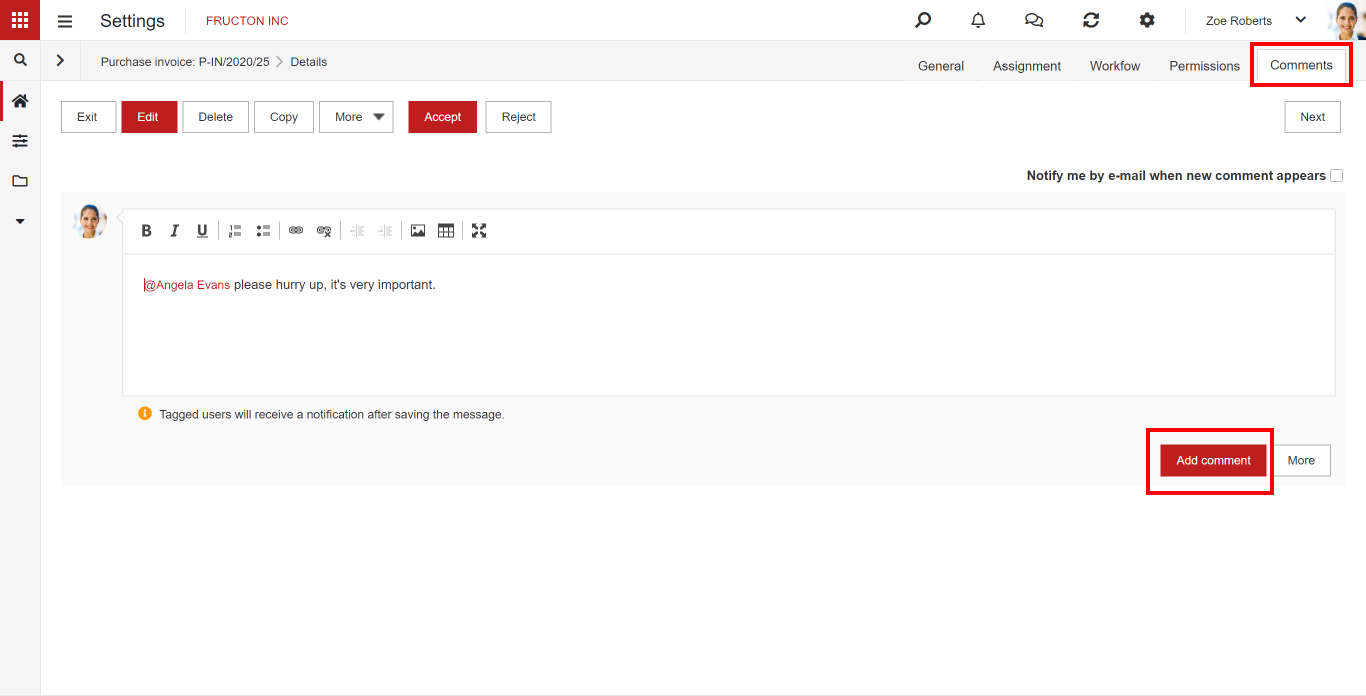
Comments
Comments allow us to add comments to documents and to easily communicate with the person indicated in the comment. The use of comments is described in detail in the article on communication in the system.
Attachments
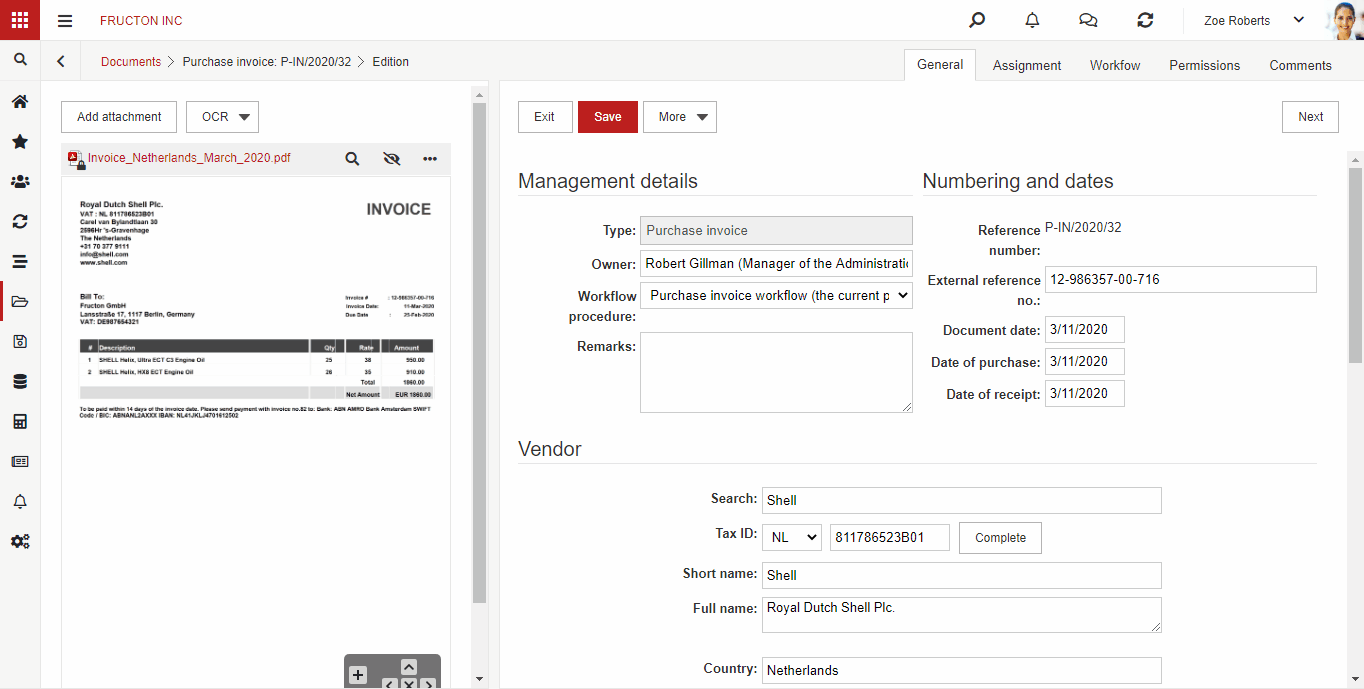
The attachment panel is not a typical tab, but a form element visible from each tab. If we are in the editing mode, we can add an attachment or call the OCR function, i.e. image recognition. We can add any number of attachments to the document.
If there is too little space on the screen, we can hide them.
Electronic signature
If the document is in PDF or Microsoft Office format – i.e. Word, Excel, PowerPoint files – you can sign them electronically in the system. This option is in the attachment menu.
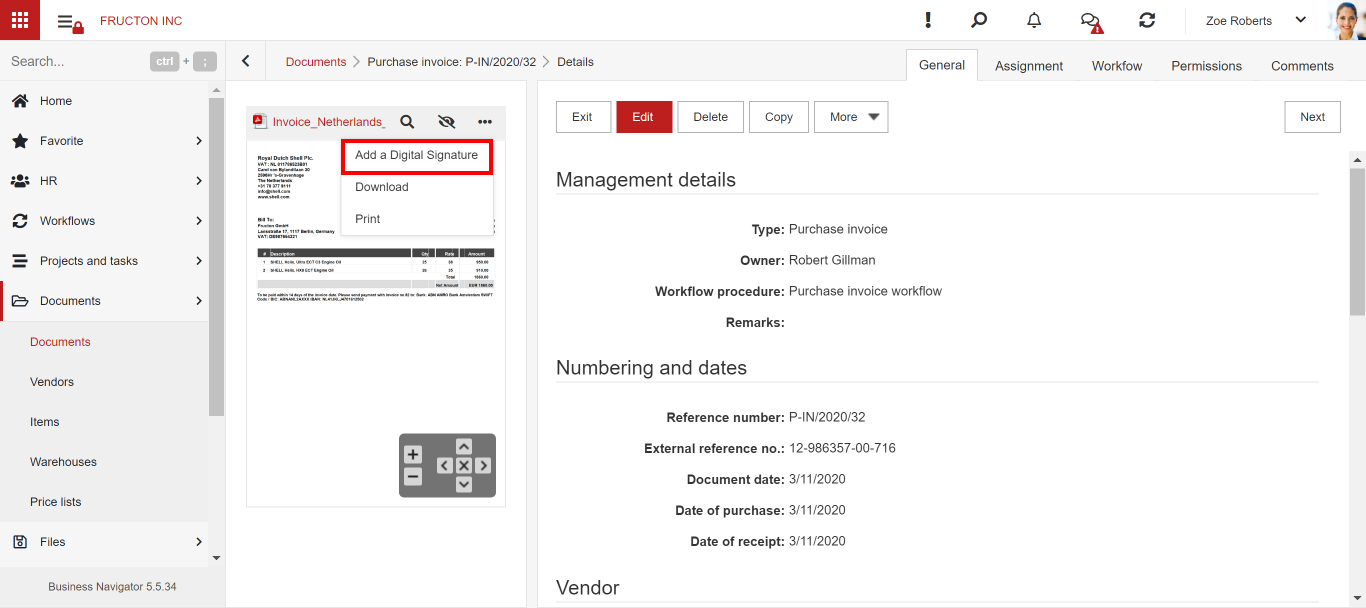
To sign it, you must install the local application supplied with the Navigator system. When selecting the Add signature option, the system checks if the program is installed and, if not, proposes to install it. Instructions for installing the signature program and system configuration can be found in a separate article.
If the local program is properly installed, selecting the Add signature option will start this program. The program may appear at the bottom of the screen, then click on it.
The program window for indicating the certificate will then appear. The Navigator system does not come with any certificate for electronic signature. To use this option, you must purchase a commercial certificate. The Navigator system requires a properly installed signing certificate on the local computer. Details of certificate installation and its use can be found on the websites of electronic signature solutions providers. The Windows certificate is used in the example below.
After the attachment is properly signed, the icon on the attachment changes – a padlock means that the document has been signed.
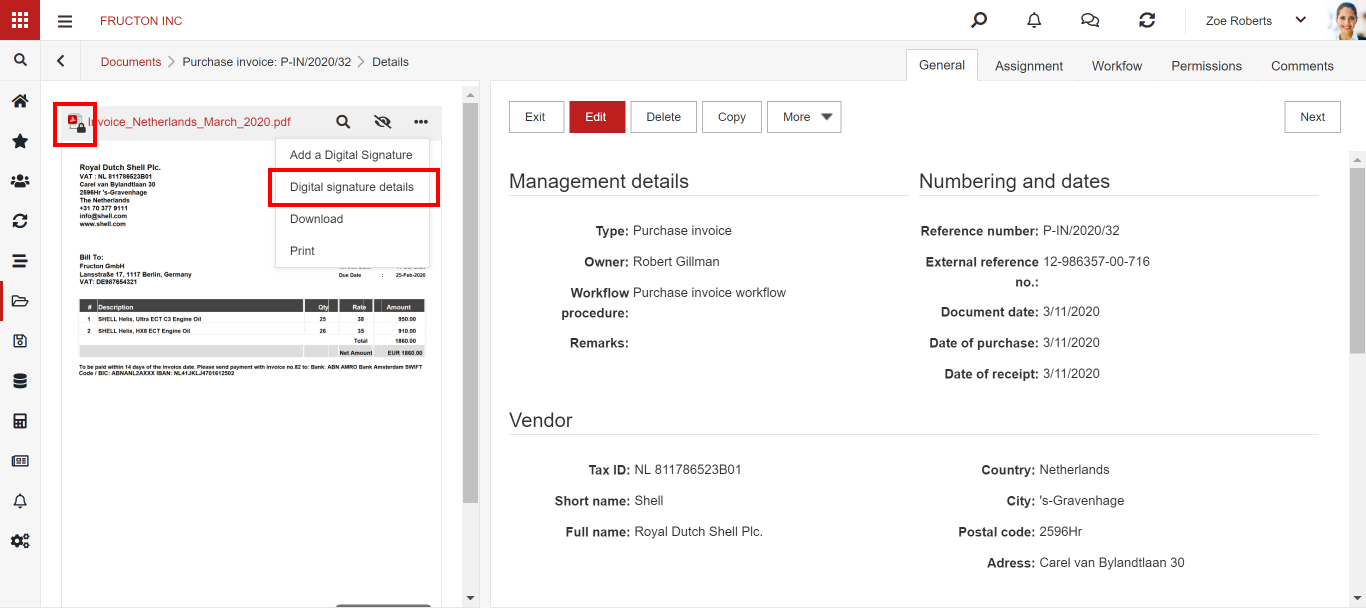
We also get access to a new functionality – preview of signature details.

Other tabs
Other tabs dedicated to a specific type of document may appear on the document form.
Document operations
OCR
Having an attachment, we can use OCR tools to recognize the text. Currently, the Navigator system uses two such tools: Google, a free tool from a well-known Internet service provider, and Abbyy, a commercial (separate license required) tool from a recognized OCR software manufacturer. The tool is selected by the administrator at the system configuration stage, the user cannot change the selected tool.
Thanks to the OCR function, we can automatically fill in the fields on the document by reading them from the scan of the document.
Create a document from another document
In order to speed up work in the Navigator system, the function of creating documents on the basis of existing ones has been implemented. How does this feature work? In our daily work, we have many pairs of documents closely related to each other, for example:
- invoice and correction invoice
- purchase invoice and receipt to the warehouse
- transport order and logbook
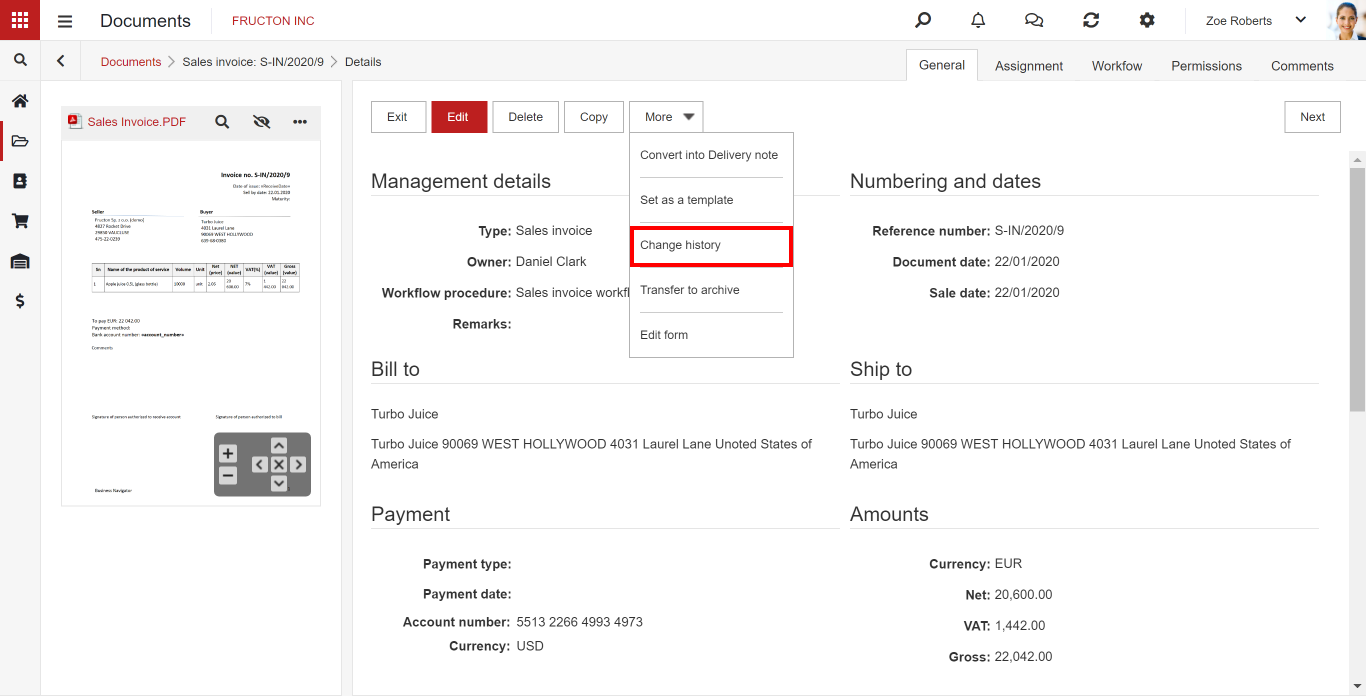
After opening a document, the More menu has a Convert to option with document name. After selecting this option, a new document will be created with the data copied from the source document.
Template document for the contractor
In a situation where certain documents of the same type from one contractor are often repeated – an example may be an invoice for telecommunications services or media – it is worth considering indicating a model document for the contractor. If such a document is selected, each subsequent document will contain the fields copied from the model document.
Change history
Selecting this option displays information about the modifications to the document. Depending on the selected option, when configuring the system, we will receive information about the last changes of each user or about all changes made to the document. In special cases, the administrator can disable saving the history of changes, then we will not see any information about the changes made.
We can preview each saved change. After clicking on the link in the window, we can display the document view as it was after the change was made.
Workflow
Consultations
Sometimes we are not able to decide on a document on our own. We need to consult the decision with other employees. There are tools in the Navigator system to help you do this. All you need to do is select the Consult option, select the person and write what we need from them.
These are ad hoc activities that go beyond the defined workflow. It allows the circulation of other people than those that were indicated when creating the circulation.
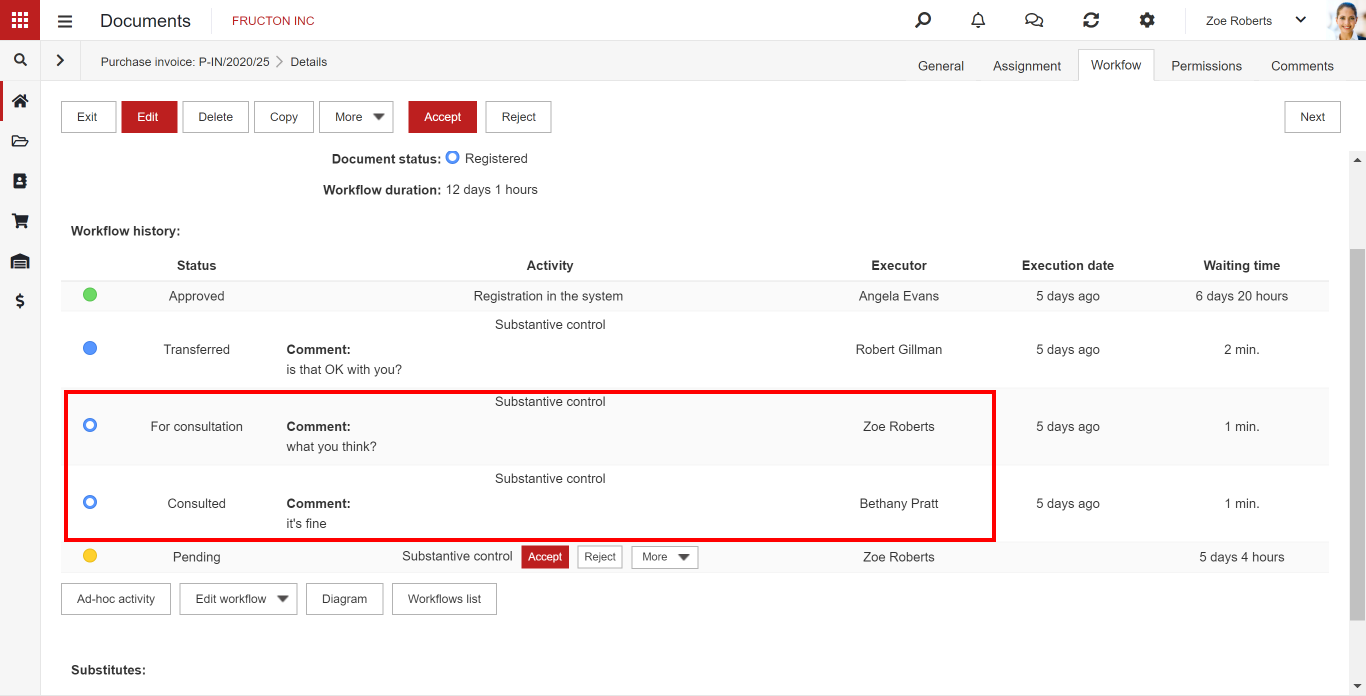
If the person to whom we send a request for consultation responds, the circuit returns to us and waits for the action to be performed in the step in which we referred the matter for consultation.
Delegate the task
Delegation of the task works similarly to consultation, here we can also indicate a person from outside the workflow to whom the action will be transferred. The difference is that while during consultations the workflow returns to the person responsible for the workflow step, in the case of transfer, the person to whom we transfer it must complete the current step in the workflow.