


What is a form?
In the Business Navigator, a form is a collection of fields, tabs and containers – properly organized and configured, creating one coherent whole aimed at visualization and comfortable handling of a given type of document.
Building the form
The form has to be properly structured. To correctly add the form, add in turn:
- Form
- Tab
- Container (optional)
- Embedded field/Attribute/table
- Container (optional)
- Tab
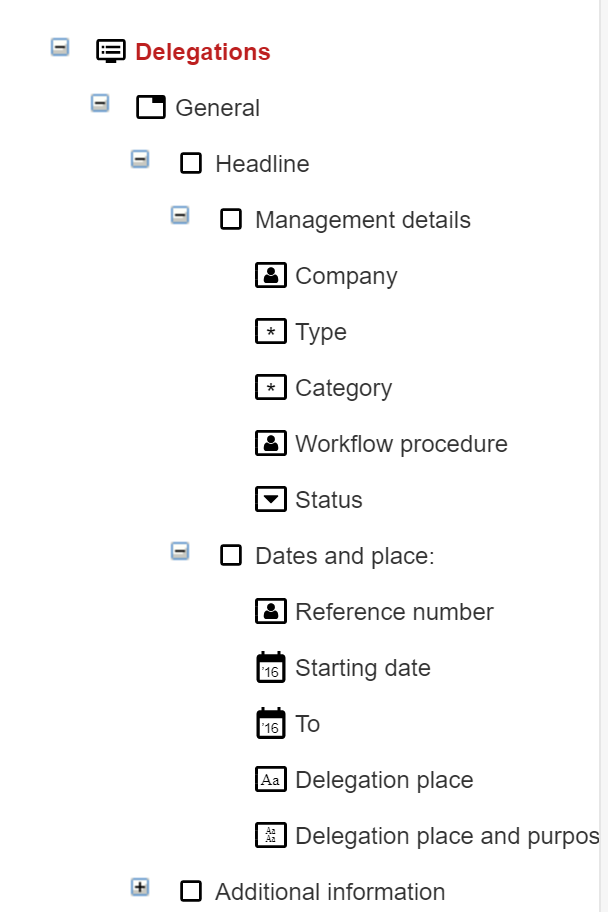
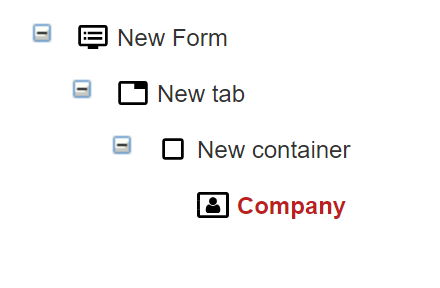
For example:
You have a form (Delegation), then a tab (General), then a container (Headline), two more containers in the container (Management details, Dates and place), and fields in the containers Management details (Company, Type, etc.) and Dates and place (Reference number, Starting date, etc.)
Form groups
Forms can be created for different groups (types of document / table types in database):
- Documents
- Tasks
- Contractors
- Budgets
- Budgets scenarios
- Elements of application dictionaries
- Assortments
- Processing
- Data sources
- Companies
- VAT Rates
- Roles
- Activities whitin procedures
- Tags
- Planned payments
- Payment settled
- Types of contractors
For each of the above-mentioned groups, there are different so-called Built-in fields available.
Adding a form
STEP 1: To add a form, go to Settings / Personalization / Forms and press the Add button

STEP 2: A form will appear; fill in all the required data and press save.

Remembering of the appropriate structure of the form (described in section Building the form), add a tab. To add any element, expand the More menu (being in the target element) and press Add element
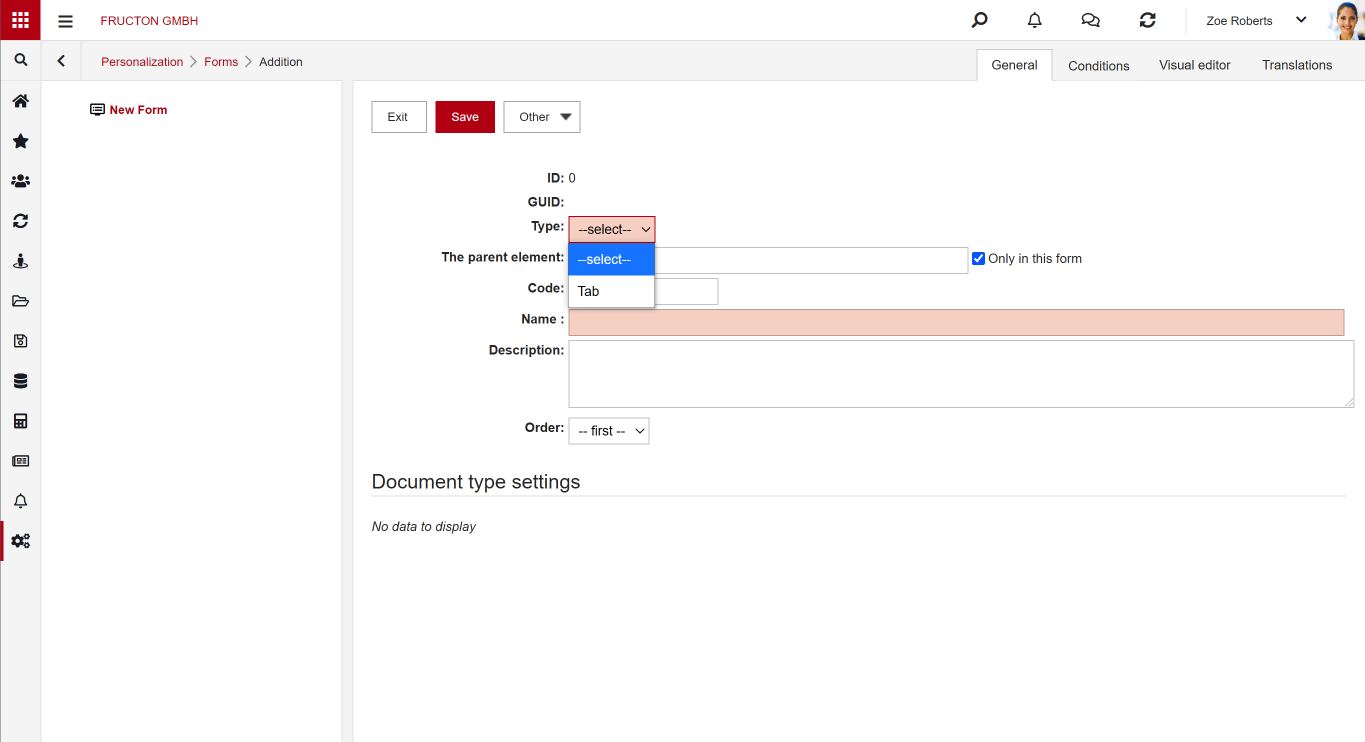
STEP 3: Only a tab can be a child element of the form, so add an element of this type.
STEP 4: Then add the container.
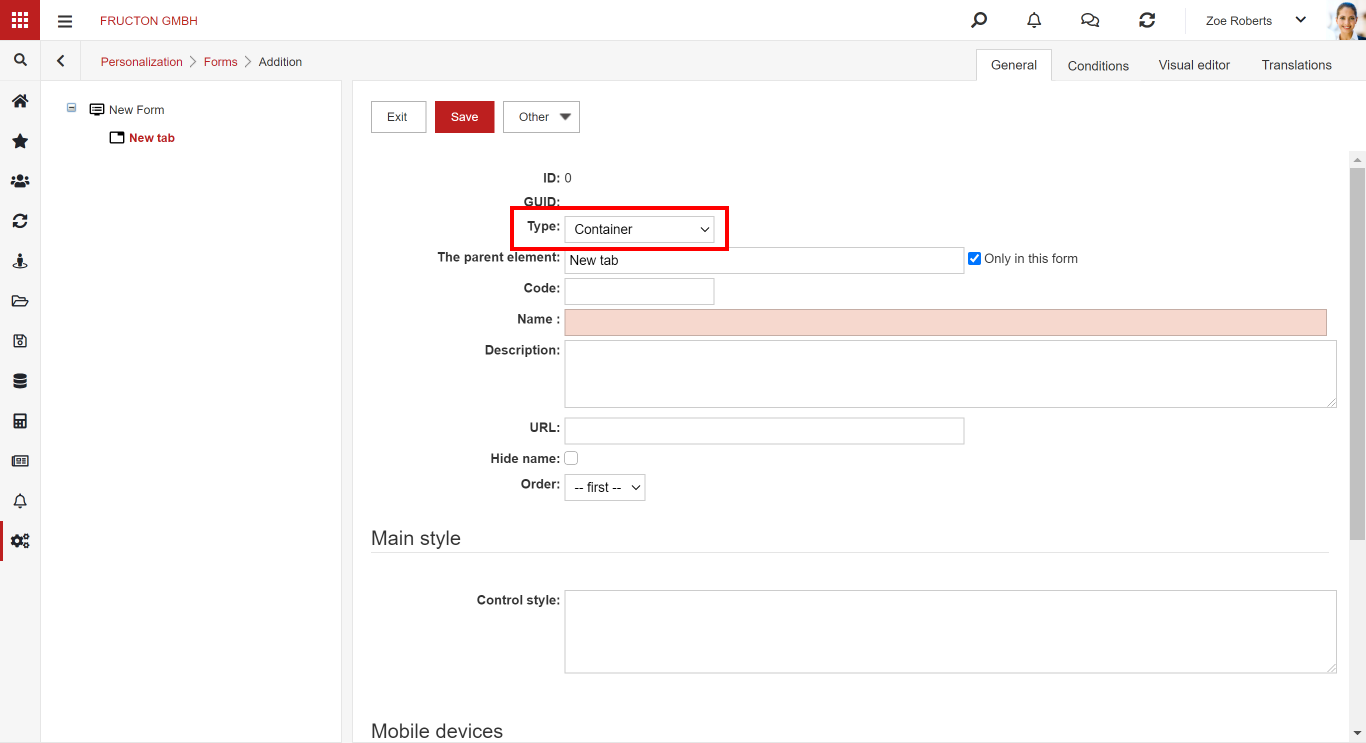
The result of the work will be the structure that can be seen on the screen below:
STEP 5: The fields and attributes are the children of the container. It is worth noting that in order to connect the form to the document type, it must have the field Permissions. If you want to create a workflow procedure for this document, form should have fields Workflow and Workflow procedure.
According to the guidelines, you should add such fields to the container. All of the listed ones can be found after selecting the Embedded field type. After adding the Company field, in order to add another required fields, remember to return to the parent element (the container) and add a new element from there. Thereby the container will be the parent element of newly added.

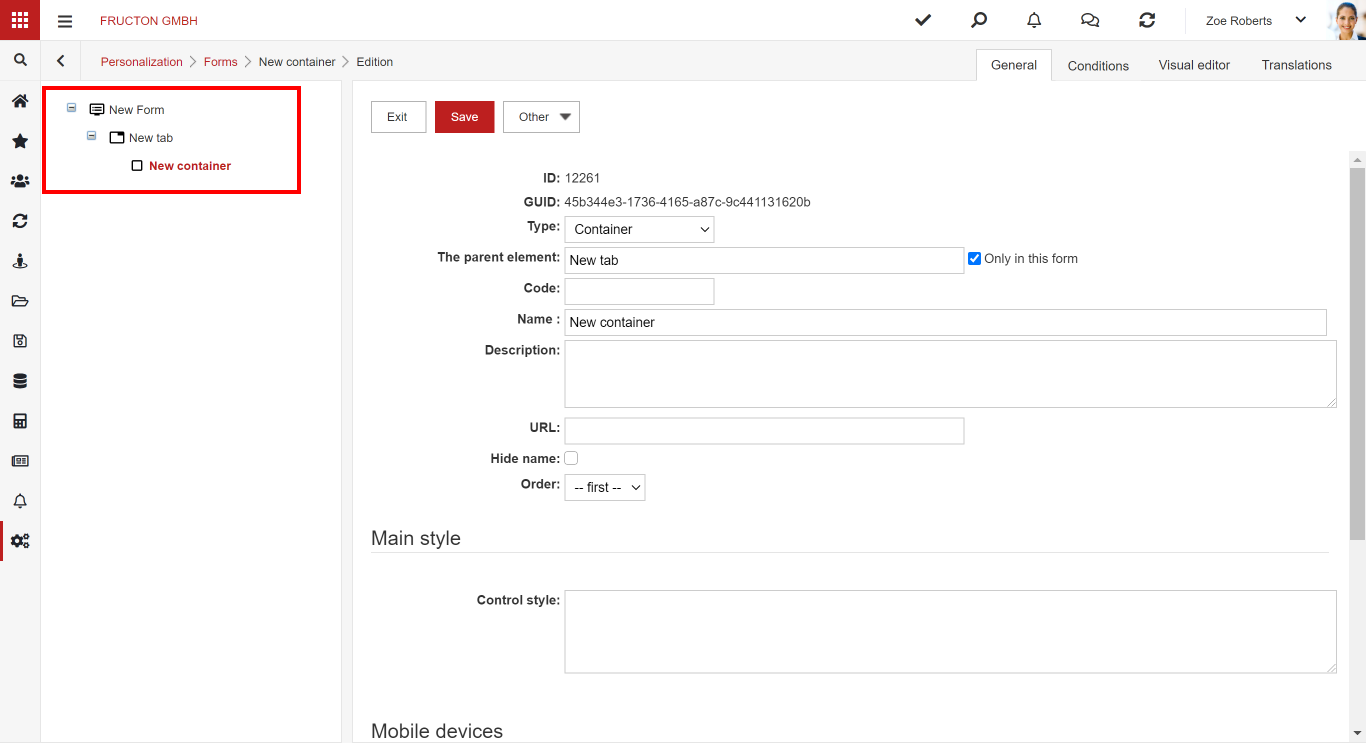
In the panel on the left side there is a tree that dynamically updates when the new elements are introduced. At this point, you should already have the following structure:
Similarly, you add the fields Type and Category.
In case of the Permissions field it is recommended to put them in a separate tab because this field is larger than the previous ones.
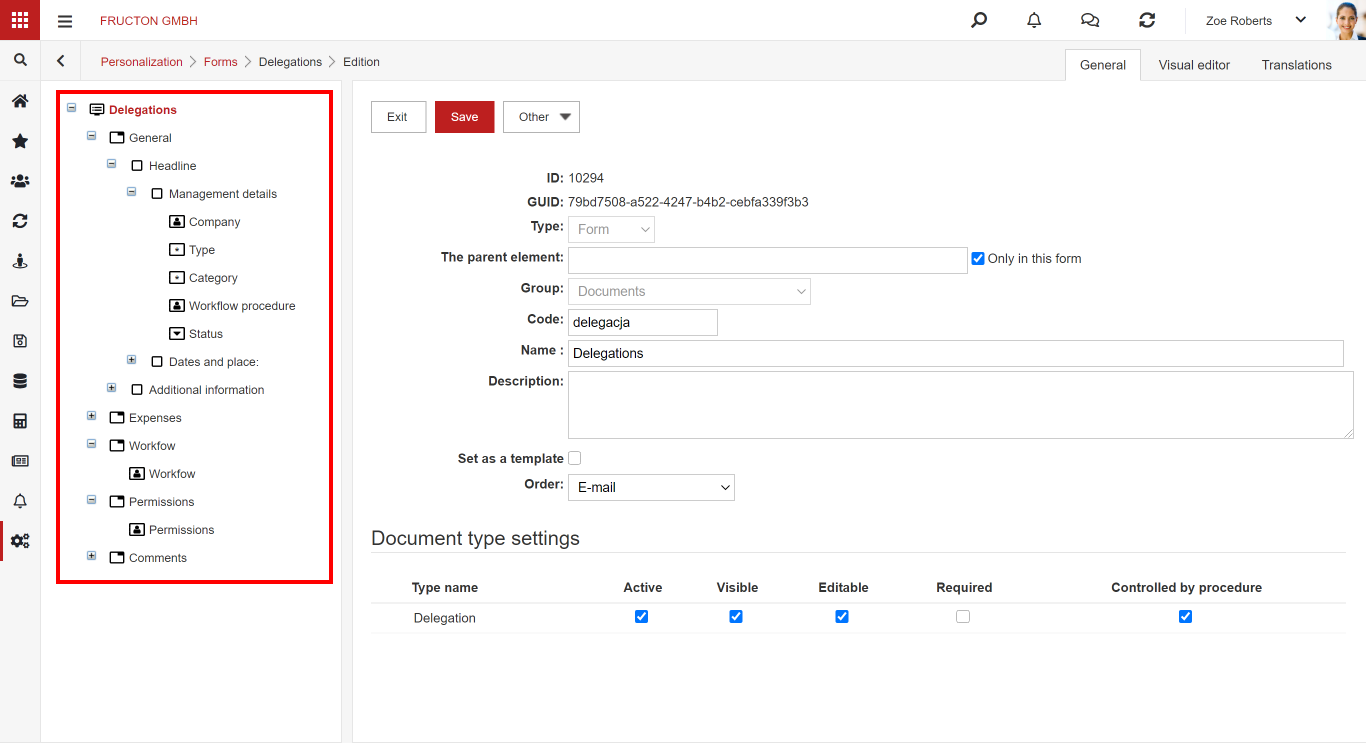
After completing the above steps, the structure of the form should look like this:
Connecting the form to the type of document
STEP 6: Having all of the required fields, you can link the form to a specific type of document. To do this, go to the Settings / Personalization / Document types module, select the appropriate Document type, go to the Form tab and select an item from the list
After selecting the form, the Form Management section will appear, in which you can choose which field should be Active / Visible / Required / Procedure controlled.

STEP 7: After adding a document of the type to which we have attached the form, You may see the fields and tabs you added to the form.
An example of adding the simplest form has been shown, while the configuration options and types of fields will be presented later in the manual.
Visual editor
The form can also be created and configured with the help of the visual editor. To do this, after adding the first “layer” of the form (STEP 1 and 2 from point 4. Adding a form), go to the Visual editor tab

A description of the visual editor can be found in the knowledge base
Conditions
Form elements have a Conditions tab in which you can configure or, for example, make the value / visibility / editable, etc. dependent on another field from the form. Depending on the type of item, different sections are available.
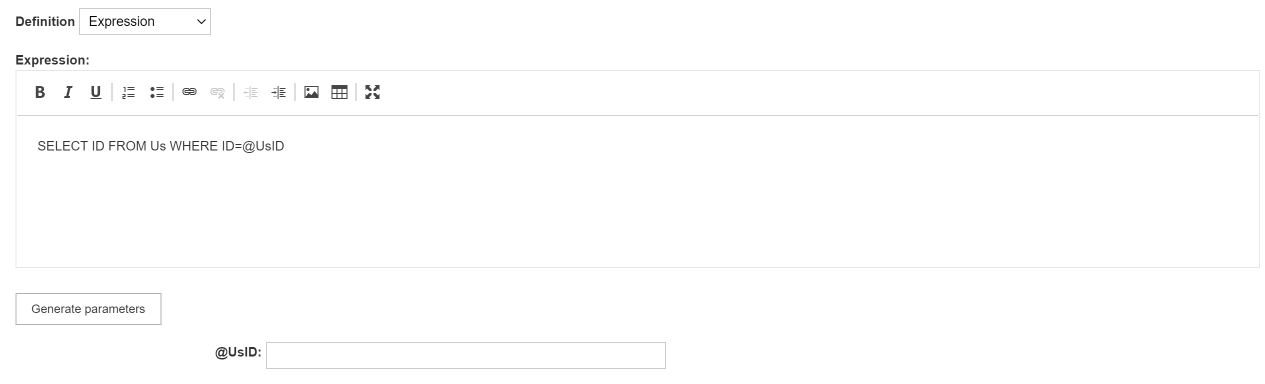
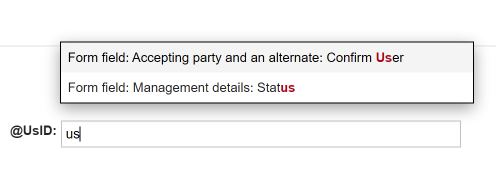
In individual sections, you can use parameters. To use this option, select the definition Expression in any section and enter the name of the parameter in the field, starting with the @ sign, and press the Generate parameters button. Than the auto-complete field with all available elements of form and system variables will appear.
You will have a choice of fields from the form:
and dedicated system fields, such as:
- GUID of form field
- ID of the logged-in user’s department
- ID of edited object
- ID of form field
- ID of the supervisor of the logged-in user
- ID of position of supervisor of the logged-in user
- ID of position of logged-in user
- ID of logged-in user
Each of the sections also has predetermined definitions. The definition tells how you can fulfil a specific condition.
Defining conditions:
- Expression
- SQL expression where you will need to return ID or ID and Value
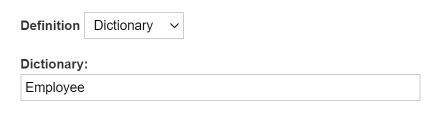
- Dictionary
- Possibility of connecting a dictionary to the field from which the values will be retreated
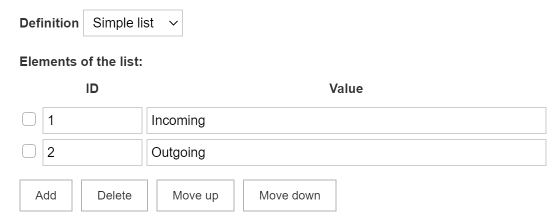
- A simple list
- Possibility to manually add elements e.g. to a data set
- Simple condition
- Used for sections like Visibility / Editable / Required

Types of conditions
Limitation od data set
OBJECTIVE: Possibility of narrowing down the selected data collection
DEFINITIONS: Expression
AVAILABILITY: Mainly when the selected field has a specific data set already attached, e.g. the field owner
RETURN VALUE: The section must return the ID of the elements from the attached data set
EXAMPLE: Narrowing the list of documents to a specific category: SELECT ID FROM Do WHERE DoCaID = 5 AND Deleted = 0
Data set
PURPOSE: Ability to set data collection for the field
DEFINITIONS: Expression, Dictionary, Simple List
AVAILABILITY: The section is visible, among others for attributes such as Auto Search or Drop-Down List
RETURN VALUE: The section must return the ID and Value of the data collection
EXAMPLE: Employee list: SELECT ID, Name + ‘ ‘ + Surname AS Value FROM Us WHERE IsActive = 1
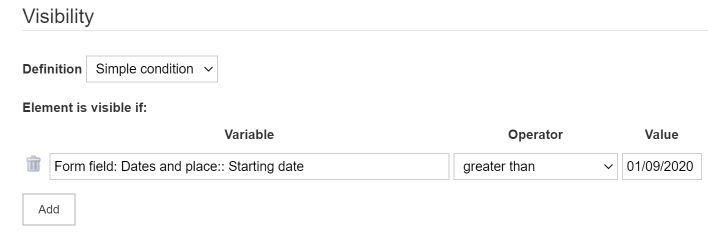
Visibility
OBJECTIVE: Ability to set field visibility
DEFINITIONS: Expression, Simple Condition: Expression, Simple Condition
AVAILABILITY: Section available to most fields
RETURN VALUE: Section must return 0 (invisible) or 1 (visible)
EXAMPLE: The field will be visible if the document date is greater than the given value:
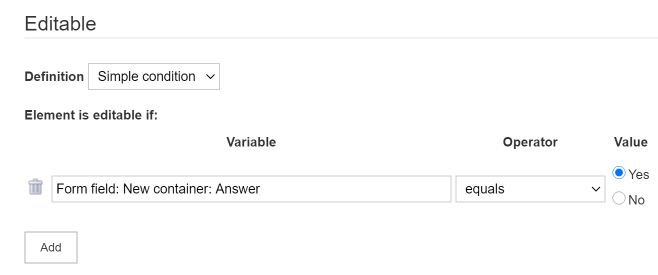
Editable
PURPOSE: Set possibility to edit the field
DEFINITIONS: Expression, Simple Condition
AVAILABILITY: Section visible to most fields
RETURN VALUE: The section must return 0 (non-editing) or 1 (editing)
EXAMPLE: The field will be editable if the field value is equal to Yes:
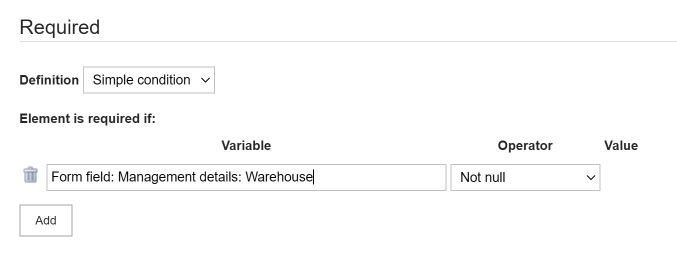
Required
OBJECTIVE: Possibility to set the required field
DEFINITIONS: Expression, Simple Condition
AVAILABILITY: Section visible to most fields
RETURN VALUE: The section must return 0 (not required) or 1 (required)
EXAMPLE: The field will be required if the value of another field is not empty:
Default value
OBJECTIVE: Ability to set the default value of the field (the value displayed when adding a document)
DEFINITIONS: Expression, Simple Condition
AVAILABILITY: Section visible to most fields
RETURN VALUE: The section must return a specific ID and Value with a default value
EXAMPLE: Setting a different value depending on a given parameter:
IF @OtherField = 1 SELECT 1 AS ID, ‘Yes’ AS Value ELSE SELECT 2 AS ID, ‘No’ AS Value
Correctness condition
PURPOSE: Ability to set validation for the field. If validation condition will not be fulfilled, user will not be able to save the document.
DEFINITIONS: Expression, Simple Condition
AVAILABILITY: Section visible to most fields
RETURN VALUE: The section must return a specific a single value: 0 – the value is incorrect; 1 – the value is correct
EXAMLPE: SELECT CASE WHEN @OtherField !=GETDATE() THEN 1 ELSE 0 END
Automatically calculated field
OBJECTIVE: Ability to set the field value automatically – without having to save the documents
DEFINITIONS: Expression
AVAILABILITY: Section visible to most fields
RETURN VALUE: The section must return the ID of the element from the attached data set, or e.g. as in the case of text fields, any value
EXAMPLE: Average value of two fields: SELECT (@ field1 + @ field2) / 2
Action
OBJECTIVE: Ability to set the action after pressing the button / change the value in the field
DEFINITIONS: Expression
AVAILABILITY: Section visible to most fields
RETURN VALUE: The script does not have to return any value, it only performs the given action. Optionally, when we return an expression, the system will treat it as a message and display it
Form elements
All available elements for creating forms are described in a separate article.